1

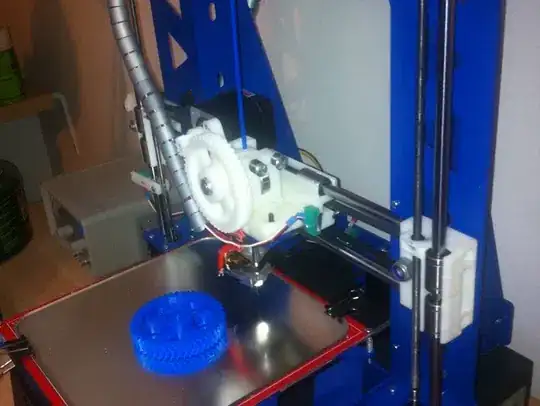
Here is the X-axis of the P3Steel:

X-axis arm of P3Steel

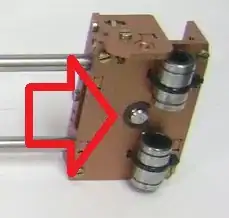
The X-axis idler end of a P3Steel printer, employs an 8 mm diameter rod for the axle on which a 608zz bearing is mounted for the GT2 belt. This 8 mm rod is approximately 20 - 24 mm in length, with grooves at either end, for circlips.

A photo of the assembled idler, with the rod and circlips highlighted:

X-axis idler end

My question is: Does this part need to be custom made?

The short rod didn't come with the frame kit that I purchased (nor was it listed in the parts list, or shown in the photo of the parts - so it not as if it was omitted with my order). I have searched on eBay for it, using various search terms, and I am unable to find one. As I was not trained in mechanical engineering, I am not sure if this part has a special name, or is it just called a "smooth rod, with grooved ends"? I have also done a fair amount of googling, and although I have found some people who have constructed this particular frame, no one makes mention of this axle, nor any difficulties in sourcing it.

I have contacted the supplier of the frame, Frame Prusa I3 P3Steel v4.0 +RODS, and I am awaiting a reply.

This missing part is holding up my build progress - I already have the 608zz bearing and circlips.


Additional images

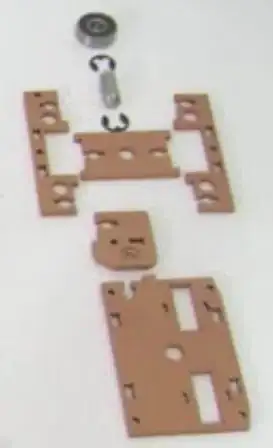
This image shows the "exploded view" and the 8mm rod can be clearly seen:

Exploded view of the parts of X-axis idler

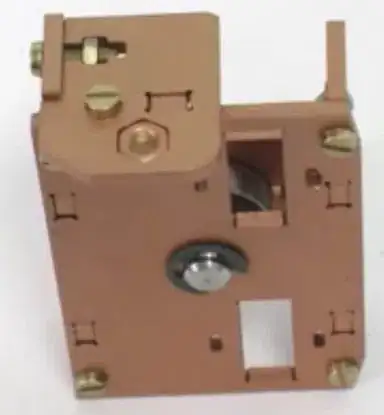
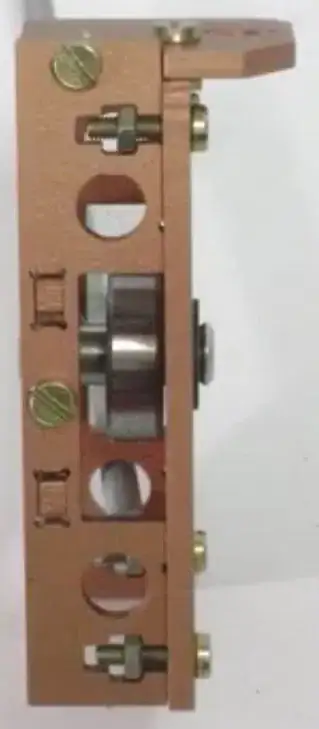
Here are images of the assembled idler, showing the bearing inside -

Front view:

Front view

Side view:

Side view

This images are a little blurry, as they are screen shots taken from the video, I3 Steel CORDOBESA con extrusor/with extruder.

Greenonline
  • 5,831
  • 7
  • 30
  • 60
  • It almost looks like a rivit.. – StarWind0 Jan 05 '17 at 19:07
  • @StarWind - I can see what you mean, but it's not a rivet, there are circlips on the front and (I assume) the rear also. I'll try to find a better photo - that picture was a screenshot from a YouTube assembly video. – Greenonline Jan 05 '17 at 19:11

3 Answers3

2

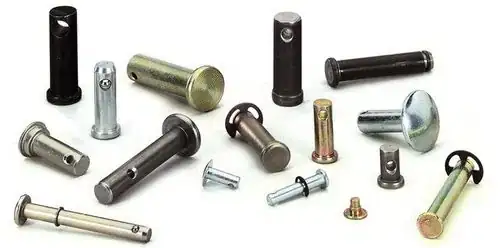
You could look up a Clevis pin with one groove.
You could look up a Clevis pin with a hole for a split pin.
Perhaps a Shoulder screw with a ground shank and a low profile head.
Use a plain rod with Dome caps if you will not need to remove often.
If available an internal threaded Standoff would work.
A Slotted spring pin may work if the hole dimensions are suitable.

EDIT:
You could also cut the grooves yourself pretty easily. Cut a section of 8mm rod to length and mount it into a drill chuck so it stick out 2-3mm 1/8". Hold a hacksaw at the edge of the chuck and run the drill for a minute with gentle pressure, try hacksaw on other side or reverse direction if nothing is happening.
A hardened rod will cut better with a Dremel type cut-off disk

enter image description here

KalleMP
  • 136
  • 3
1

Oh fascinating. It took me a while to figure out what exactly that is. It is a smooth rod used as the idler for the X belt.

What I would do is get a bearing / wheel. Take a thicker screw, nut and washer. Put the idler / bearing / wheel into the slot, then fit the screw / nut. Should work without any issue!

That said they likely had some sort of special fitting etc. Doesn't matter so long as the belt can move without wearing.

This Thingiverse does exactly what I am thinking.

bolt example

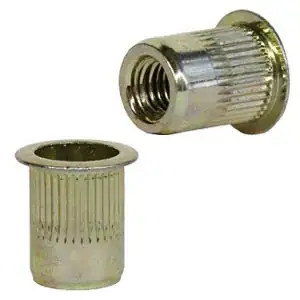
As you have a low profile need due to the interesting design I came across this. a TNF8 - Nut Sert - Flanged/Ribbed. enter image description here

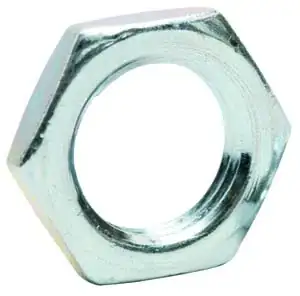
Or you may just need a standard low profile nut. Not like you need it to do more than hold it in.. enter image description here

StarWind0
  • 3,023
  • 3
  • 12
  • 29
  • Thanks for the reply. The smooth rod is not the idler, per se, yet it _is_ the axle for a 608zz bearing. I have updated my question, with additional images and a link to an assembly video, that I found on YouTube. I had considered using an M8 Bolt, however, space is rather tight, and the head of the bolt could interfere with both the Z-axis 5 mm smooth rod and the M5 threaded rod (or M8 lead screw). Hence the requirement for the grooved rod, and the circlips, as this requires less clearance. – Greenonline Jan 06 '17 at 12:30
  • Yeah that's exactly what I thought it was – StarWind0 Jan 06 '17 at 15:52
  • Yeah that is a tight design. Contacting the MFG for the part / the seller is best.. Else you will be Epoxying that thing together... – StarWind0 Jan 06 '17 at 21:22
  • 1
    You know they do sell thin nuts. Edited answer for something that may help – StarWind0 Jan 06 '17 at 21:23
  • -The nut sert looks promising. :) – Greenonline Jan 06 '17 at 22:35
  • I do hanker after that special short rod though. I have contacted my Polish supplier, but as I mentioned, they aren't very communicative. I may need to try to contact the Spanish chaps who designed the idler, if/when I manage to locate them. – Greenonline Jan 06 '17 at 22:40
1

I have finally received a reply from my supplier, which backs up StarWind's answer:

I did not use a rod with grooves for retaining rings.

I used bolts and nuts with a thin head.

Doesn't really answer my question though, as I really rather hanker after the 8 mm smooth rod with the circlip grooves.

Greenonline
  • 5,831
  • 7
  • 30
  • 60