0

I'm running a stock Ender 5 pro with the filament that came with it, and using Creality Slicer 4.8.2, but I'm only able to get reliable bed adhesion if I increase the bed temperature from 50 to 60 °C for the bottom layer and decrease the print head speed by about 75 % from the default profile for the Ender 5.

The machine is absolutely stock, and is fresh out of the box except for bed levelling.

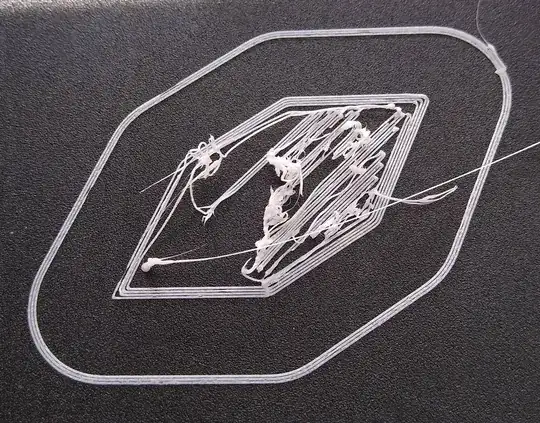
I used the default bed leveling print and that came out well, so I'm reasonably certain that it's not a bed leveling issue. The problem seems to be with models that I've made myself in blender and exported as STL files.

In all cases the raft that was generated by the Creality software has printed out perfectly, but the print has only partially gone down when it came to the model itself. enter image description here

0scar
  • 32,029
  • 10
  • 59
  • 135
Aaargh Zombies
  • 1,286
  • 3
  • 10
  • I don't know if you're looking for a technical answer but that is normal. First 2 layers should be printed slower for better adhesion. Personally I set the bed temperature to 20-30 degrees higher for the first layer which improves adhesion to the bed and then lower it or turn it off completely to minimize warping. – AzulShiva Jan 16 '22 at 19:36
  • I'm confused as to why I need to make any changes at all as I'm using all Creality software and hardware with their own profiles and filiment. – Aaargh Zombies Jan 17 '22 at 08:57
  • There's a setting under PrintSettings/Speed/NumberOfSlowerLayers. Make sure your bed is leveled and you are using proper adhesives. Every printer requires tweaking and you should make your own profiles. This is how it is, 3d printing is not that easy. I don't know if you're new to printing or you have worked with machines that cost >$5000 that do everything automatically while rubbing your balls and holding your coffee. – AzulShiva Jan 17 '22 at 09:04
  • First fdm printer, I'm a resin veteran – Aaargh Zombies Jan 17 '22 at 09:26
  • I have an ender 3 and I have to fiddle with it constantly even when printing PLA. FDM printers clog, underextrude, string, warp, split, fail to adhere, droop, and it's up to you and only you to get it to work. That's pretty much the answer to your question. PLA is easy, good luck once you enter Nylon 12 or even Polyethylene territory where different models will require different settings... you'll be in a world of pain. – AzulShiva Jan 17 '22 at 09:34
  • And I thought resin was supposed to be the harder option. My saturn printed off the bat using the default settings. – Aaargh Zombies Jan 17 '22 at 09:45
  • 2
    Judging by the picture you're not using any print adhesive. Also your bed level is waaaay too low. The extruded filemant should look flat, but not too thin. https://ucarecdn.com/c7283aa8-5d84-4c2c-8cd2-a93a3c7c3af7/-/format/auto/-/preview/3000x3000/-/quality/lighter/ – AzulShiva Jan 17 '22 at 10:06
  • https://www.3dmakerengineering.com/blogs/3d-printing/3d-printing-the-perfect-first-layer – AzulShiva Jan 17 '22 at 10:06

3 Answers3

4

Your bed is too low - raise it by turning the knobs underneath.

The first layer should not look like strings sitting on the bed as per your photo. Instead it should be a wider strip that looks somewhat like an electronic circuit trace, or like someone has pushed wet paint out of a tube that is being wiped across the surface.

My method is to head the bed with "preheat" in the menu, and let it sit at printing temp for at least 5 minutes. This avoids the heater being at temp but the top of the glass bed being cool.

Then start your job. As the brim or skirt is printed, actively watch it in person and twiddle the height knobs a quarter turn at a time. You want the "end view" or cross sectional view of the printed filament to be like this:

 _____<==>_____

and not like this

 ______0______

and definitely not like this

       0
_______________

If the head starts scratching the bed, you've gone too far so lower the bed back down again (effectively raising the print head a little)


Here's a print in progress trying to show a better brim. Notice eachgstrand is ovalised and mushed down. That brim will come off in one piece afterward.

enter image description here

Criggie
  • 902
  • 4
  • 15
  • 2
    Who said ASCII art is dead? Nicely done! +1 just for the art. – agarza Jan 17 '22 at 23:53
  • The bed was the first thing that I checked, it's absolutely level and at the correct height, I pre heated it and did it 3 times and did calibration prints that came out perfectly 3 times. The brim and skirt also came out perfectly, in fact everything that was automatically generated has been perfect. It's only the bottom layer of the model which isn't sticking unless I go outside of the manufacturer recommended settings. – Aaargh Zombies Jan 18 '22 at 11:36
  • @AaarghZombies Based on your photo, the first layer is going down as separate strands, where it should be mushed to a strip. Try raising the print bed a very little amount and see if it improves, then iterate. – Criggie Jan 18 '22 at 11:40
  • I've adjusted the height 3 times, no change. I don't understand why the brims and skirts go down perfectly but not the first layer of the model – Aaargh Zombies Jan 18 '22 at 13:18
  • 1
    @AaarghZombies: Looking at your photo, the brim and skirt did **not** go down perfectly. The adjacent extrusion lines are not touching each other and barely touching the bed. Your bed is **way too low**. It needs to be raised by at least 0.15 mm, perhaps more. The only reason those lines stayed in place at all is that there are no sharp turns in the toolhead path and the molten material had some time to cool before forces started pulling in a different direction. – R.. GitHub STOP HELPING ICE Jan 18 '22 at 15:52
  • @AaarghZombies If I measure a priming line scraped off the bed, it is 15 thousandths of an inch thick and 51 thousandths of an inch wide. That is 0.4mm thick and 1.3mm wide, and shows empirically the amount of squash your first layer should have. The strands should not be round. (sorry for SAE, my small micrometer is vintage and therefore imperial) – Criggie Jan 18 '22 at 21:39
  • I used a sheet of A4 printer paper to do the levelling. I'm pretty sure that I've got a feeler gauge set stashed somewhere, what is the correct height? – Aaargh Zombies Jan 19 '22 at 21:17
  • @AaarghZombies in my experience, the paper method leaves too much gap. The only reason for using it is to make the bed roughly equal at all corners. Then when I print next time, I watch the brim go down and adjust on the fly while the print head moves around. I might be able to do some video of this process if that helps ? – Criggie Jan 19 '22 at 21:27
1

Assuming Creality's stock firmware still doesn't have Linear Advance enabled, there's a fairly hard requirement to go slow on the first layer. This is because, as the toolhead accelerates up to higher speed without advancing the extruder extra to compensate for the backpressure in the filament-path/nozzle, you'll have an interval of underextrusion, giving less contact area for the extruded material to cling to the bed at the same time there's added force pulling it in a direction parallel to the bed surface. This becomes less critical to adhesion starting with the second layer, since the new material is bonding to itself rather than just trying to stick to a bed.

Having the bed hot will help it stick better and maybe even help reduce the pressure at the nozzle by reducing the heat loss, so it might work around the problem. But in general, you don't want to be in a situation where a few degrees of temperature difference are the cutoff between a failed print and a successful one.

Anyway, do all the usual stuff to improve bed adhesion, and especially make sure your bed height is as close to perfect as you can get it, if you want moderately fast printing to work. But don't be surprised if you need to upgrade to a version of Marlin with Linear Advance (or to Klipper) to get successful high-speed first layers.

  • I'm confused as to why I need to slow the first layer and increase the bed heat, since I'm using Crealitys own profile wouldn't this already be slowed and heated correctly. I'm also confused as to why the brim or skirt goes down perfectly but not the first layer if the model. – Aaargh Zombies Jan 17 '22 at 09:03
  • I'm talking about slower relative to your full print speed. If you're having to go even slower than Creality's recommended speed you probably have other things in play too (most likely wrong bed height). – R.. GitHub STOP HELPING ICE Jan 17 '22 at 16:52
  • I've had to half the speed from Crealitys recommended slow speeds, so other things seem to be at play. Bed height and level redone 3 times, calibration prints all came out perfectly. – Aaargh Zombies Jan 18 '22 at 11:40
1

Looking at the image, the deposited filament lines do not connect. If we consider that you have the correct filament width in your slicer and the correct amount of steps per millimeter for the extruder or no problem with extruding is present, your initial bed to nozzle gap might be too large, level with a thinner piece of paper or subtract a few tenths, see this answer for redefining the Z-height. Alternatively use a slicer option called “Z offset setting”, see this answer.

Why does the first layer only adhere to bed if I increase the temperature by 10 °C and drop the speed by 75 %

If the nozzle gap is a little too large, the filament doesn't get squished enough for proper adhesion. This is seen as non-connecting filament lines. It looks as if the nozzle is under-extruding, but if that has been checked, a larger initial gap has the same effect. If you increase bed and or hot end temperature and slow down, the filament gets time to adhere properly, even when the gap is larger.

0scar
  • 32,029
  • 10
  • 59
  • 135