Introduction
Use this guide to remove and replace the loudspeaker in an iPhone 12. The loudspeaker is the speaker at the bottom of an iPhone.
-
-
Power off your iPhone before beginning disassembly.
-
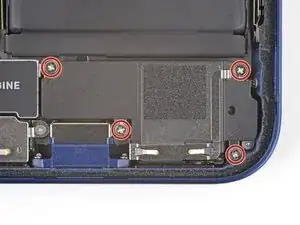
Remove the two 6.75 mm long pentalobe P2 screws at the bottom edge of the iPhone.
-
-
-
Use a hairdryer or heat gun or prepare an iOpener and apply it to the lower edge of the iPhone for about a minute in order to soften up the adhesive underneath.
-
-
-
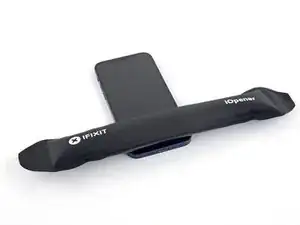
The next two steps demonstrate the iSclack, a handy tool that we recommend for anyone doing frequent repairs. If you aren't using the iSclack, skip down two steps for an alternate method.
-
If the plastic depth gauge is attached at the center of the iSclack, remove it now—it's not needed for larger iPhones like the iPhone 12.
-
Position the suction cups near the bottom edge of the iPhone—one on the front, and one on the back.
-
Press both suction cups firmly into place.
-
-
-
Hold onto your iPhone securely and close the handle of the iSclack to slightly separate the screen from the rear case of the phone.
-
Insert an opening pick into the gap under the display on the lower edge of the iPhone.
-
Skip the next two steps.
-
-
-
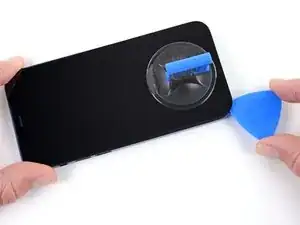
If you're using a single suction handle, apply it to the bottom edge of the phone, while avoiding the very edge of the glass.
-
-
-
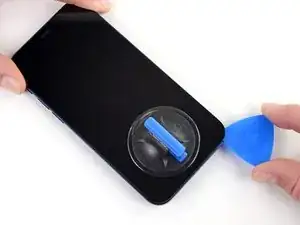
Pull up on the suction cup with firm, constant pressure to create a slight gap between the front panel and rear case.
-
Insert an opening pick into the gap.
-
-
-
Slide the opening pick around the lower left corner and up the left edge of the iPhone, slicing through the adhesive holding the display in place.
-
-
-
Re-insert your pick at the bottom edge of the iPhone, and slide it up the right side to continue separating the adhesive.
-
-
-
Insert your pick into the right edge of the phone. Slide it around the top-right corner and across the top edge.
-
-
-
If you haven't removed your suction handle or iSclack, remove it now.
-
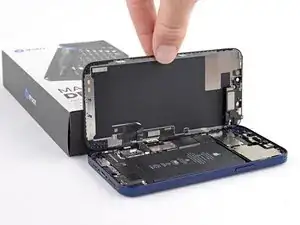
Open the iPhone by swinging the display up from the right side, like the front cover of a book.
-
Lean the display against something to keep it propped up while you're working on the phone.
-
-
-
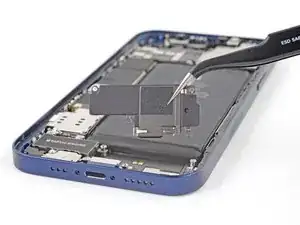
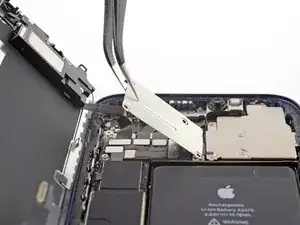
Use a spudger or a clean fingernail to pry the battery connector up from its socket on the logic board.
-
Bend the connector slightly away from the logic board to prevent it from accidentally making contact with the socket and providing power to the phone during your repair.
-
-
-
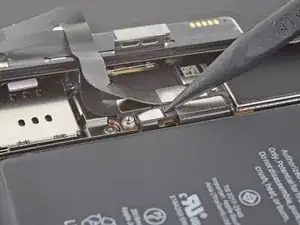
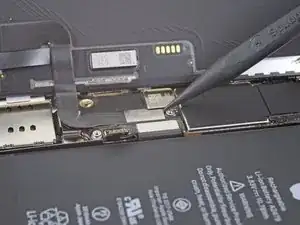
Use a Y000 driver to remove four screws securing the front sensor connector cover.
-
Three 1.1 mm long screws
-
One 1.4 mm long screw
-
-
-
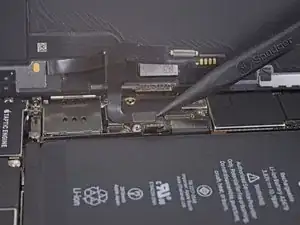
Swing the cover up from the left until the small clip on the right unhooks.
-
Remove the cover.
-


Compare your new replacement part to the original part—you may need to transfer remaining components or remove adhesive backings from the new part before installing.
To reassemble your device, follow the above steps in reverse order.
Take your e-waste to an R2 or e-Stewards certified recycler.
Repair didn’t go as planned? Try some basic troubleshooting, or ask our iPhone 12 Answers community for help.

One comment
Every guide that I've seen has you remove the screen completely before replacing the speaker. This seems to be the hardest and riskiest part of the repair. The screen ribbon cables don't seem to obstruct access to the speaker. Is there a reason that you can't leave the ribbon cables alone and just prop the screen up at a right angle to the phone body and then replace the speaker? I can see the logic behind disconnecting the battery but what about the other cables?