Introduction

This is a prerequisite-only guide! This guide is part of another procedure and is not meant to be used alone.

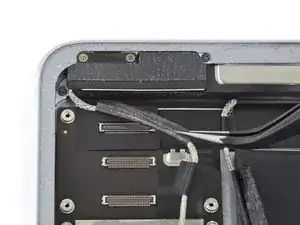
Follow this guide to detach the right antenna cable from the frame on an iPad Pro 9.7".

  1. 4fSrpT12RPOorLqZ
    4fSrpT12RPOorLqZ
    YEXM13x4vxQLEIqa
    CUUZal13vZyLAeHH
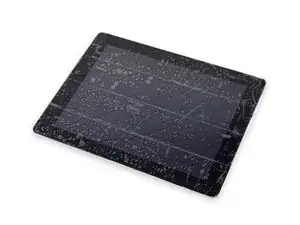
    • If your display glass is cracked, keep further breakage contained and prevent bodily harm during your repair by taping the glass.

    • Lay overlapping strips of clear packing tape over the iPad's display until the whole face is covered.

    • This will keep glass shards contained and provide structural integrity when prying and lifting the display.

    • Do your best to follow the rest of the guide as described. However, once the glass is broken, it will likely continue to crack as you work, and you may need to use a metal prying tool to scoop the glass out.

    • Wear safety glasses to protect your eyes, and be careful not to damage the LCD screen.

    Covering the screen with tape proved an essential safety step with the ipad display/lcd I just replaced. The screen was so badly broken that a part of it was almost powder, but the combination of the tape and sticky adhesive residue kept most of that together, and cleanup was pretty easy as a result. One caveat, though, is that the tape will probably make the suction cup useless for pulling up on the display. It did for me, anyway.

    John Lasseter -

  2. r4amr5F6MjBUIQnt
    • The following steps involve using an iOpener to soften the adhesive holding the front panel assembly in place. When using the iOpener, be sure to heat it in the microwave for no more than 30 seconds.

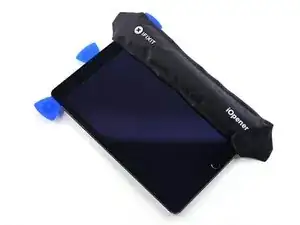
    • Handling it by the tabs on either end, place a heated iOpener over the top edge of the iPad.

    • Let the iOpener sit on the iPad for two minutes to soften the adhesive securing the front panel to the rest of the iPad.

    I see a lot of videos that show using a heat gun on low to soften the adhesive. I know there is inherent risk with this since you could start delaminating things, but is it something that could be considered (at your own risk)? Or is it something that could have more risks than I am realizing?

    joshcorey -

    Yes, you can definitely use a hair dryer, heat gun, or a heating pad. If you're using a heat gun, be careful not to overheat the display. The surface should feel slightly too hot to the touch.

    Arthur Shi -

  3. vbug1VOBMObXrrNJ
    vbug1VOBMObXrrNJ
    lM2svovREMXARVPx
    QQCvcb1RJlUkbUQW
    • While the iPad looks uniform from the outside, there are delicate components under certain portions of the front glass. To avoid damage, only heat and pry in the areas described in each step.

    • As you follow the directions, take special care to avoid prying in the following areas:

    • Home Button

    • Front Facing Camera

    • Main Camera

    Verwirrend: Es sollte heissen, dass man an den beschriebenen Stellen eben NICHT hebeln sollte.

    Felix -

    Danke! Ich habe den Teil mit dem NICHT hebeln nochmal hervorgehoben.

    Fabian Neidhardt -

  4. rpaBWg5X1LUnivHt
    rpaBWg5X1LUnivHt
    NXKEJYkJ5HpXf5cV
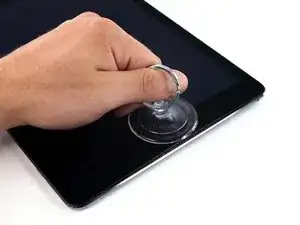
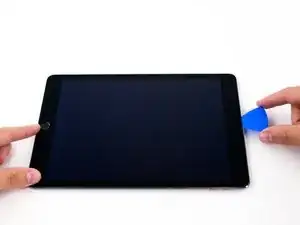
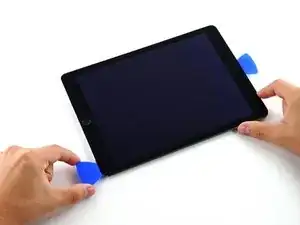
    • Place a suction cup over the iPad's front-facing camera and press down to create a seal.

    • To get the most leverage, place the suction cup as close to the edge as possible without going past the edge of the display.

  5. mJCqfjEDtJeihiXC
    mJCqfjEDtJeihiXC
    LhCLCjtgwcD4eQVo
    nZkUghUs1xfKEWTf
    • Firmly pull up on the suction cup to create a small gap between the front panel and the rear case.

    • Do not pull too hard or you may shatter the glass.

    • Once you've opened a sufficient gap, insert an opening pick into the gap to prevent the adhesive from resealing.

  6. UBZTHwdRqbwRLJAl
    UBZTHwdRqbwRLJAl
    RTJrYjnQCiMxQGEw
    4TraNDygnvQCXDJV
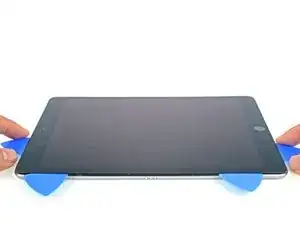
    • Slide the pick along the edge of the display, towards the headphone jack.

    • If there is still a considerable amount of resistance when sliding the opening pick, repeat the iOpener heating procedure and apply additional heat.

    • Don't insert the pick past the bezel into the display area, or you will damage it.

    • A good rule of thumb is to never insert the opening pick more than a quarter inch into the iPad.

  7. y34OmvNZddjUsgJf
    y34OmvNZddjUsgJf
    dKyTUwZlqudvsrwS
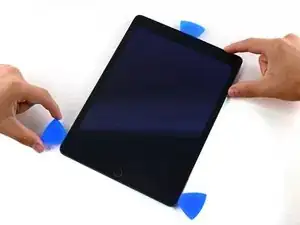
    • Insert a second opening pick by the front-facing camera.

  8. VlouIlKDBobp21ht
    VlouIlKDBobp21ht
    4D3HnAB5lW6NWtQP
    usBnHAdBOnUhgKgZ
    • Slide the second pick along the top edge of the iPad, towards the Sleep/Wake Button.

  9. QItKpaRbXb1UvjCF
    QItKpaRbXb1UvjCF
    GWdnFUu2a2WqNBRk
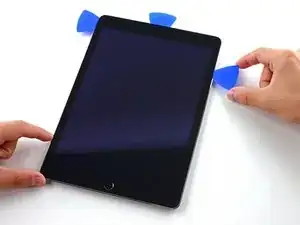
    • Insert a third pick by the front-facing camera.

  10. SB6QxHsLajVvHKLF
    SB6QxHsLajVvHKLF
    6jAjQvNWJtPA1icQ
    bfWiL6JjqPuCHktD
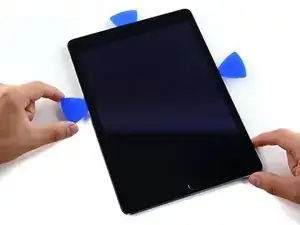
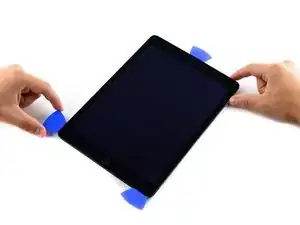
    • Bring the right opening pick down and around the top right corner of the iPad.

  11. iEwCprM5hUbjMa5M
    iEwCprM5hUbjMa5M
    btBkuNsD1BGWdmNi
    ZeLYciNptnjMD5sN
    • Bring the left opening pick around the top left corner of the tablet.

  12. fpXSlsGA4PuXZwtC
    • Reheat the iOpener and lay it over the right edge of the display to loosen the adhesive underneath.

  13. bYJQLgFB46cU2pVJ
    bYJQLgFB46cU2pVJ
    bZDFr4X45b4DahBn
    s1wTnCHfVesRTpQu
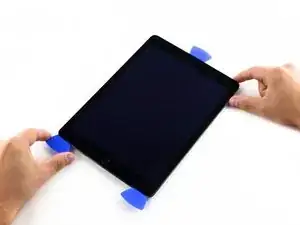
    • Slide the right opening pick roughly halfway down the display.

  14. JMuZWuybr3UclCyZ
    • Reheat the iOpener and apply heat to the left side of the iPad.

  15. IQRxoNTBSGtLM3i2
    IQRxoNTBSGtLM3i2
    ETnV2UuToukcU3om
    jJatPsp4QkC3AahX
    • Slide the left-hand opening pick about halfway down the edge of the display.

  16. GReHqx2PqZURrOmS
    GReHqx2PqZURrOmS
    EKxY1RGlSXtPGpwj
    QoZPMgkyQQwPXR6j
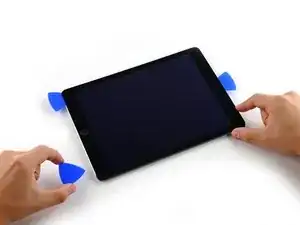
    • Slide the opposite opening pick down to the bottom right corner of the iPad.

    • If necessary, reheat the adhesive on the right edge to loosen the display assembly.

  17. wwPbdKhkSwI5hQMG
    wwPbdKhkSwI5hQMG
    LaZr2wpWCByppuVW
    UIXuRBEr3LiC3Bhm
    • Slide the left-hand opening pick down the edge of the display until you reach the corner.

  18. UsPELiDHRgD5GTqy
    • Use the iOpener to apply heat to the bottom edge of the iPad.

  19. wygPNSUXUUeMhjok
    wygPNSUXUUeMhjok
    YmJCAGY5oke2TUDU
    IlKVDslEYyMPKjBL
    • Bring the right-hand opening pick around the bottom corner of the iPad.

  20. xfVKIvrVyEGfeDkD
    xfVKIvrVyEGfeDkD
    3RsbTJPXwtVsrU5J
    2yL1bOTG6QjYfuw1
    • Repeat for the left-hand pick.

    • Reheat and reapply the iOpener as needed.

  21. IUNdFVqTQHS6UKiG
    IUNdFVqTQHS6UKiG
    h1UtPwFlqFxDEvCB
    • Remove the right-hand opening pick at the bottom of the iPad.

  22. XSUmMZChFquPbMVK
    XSUmMZChFquPbMVK
    BRuNiWvEDx3xpiaU
    G4mFOROitEkXfpcQ
    • Slide the left-hand opening pick along the bottom edge of the display, then remove it from the bottom right corner of the iPad.

    • Be very careful to not insert the pick more than a quarter inch into the display to avoid damaging the Home Button and display cables underneath.

  23. UMABNUvs1JAY5CnQ
    UMABNUvs1JAY5CnQ
    pjKHFWXeNHKb1Fwn
    n5dLBWCNCLviV3tO
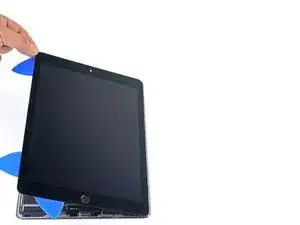
    • Use picks to ensure most of the adhesive has been cut through on the top, left, and bottom sides.

    • Twist the top and bottom picks to separate the display assembly from the rear case.

    • Do not attempt to remove the display—it is still attached to the rear case.

  24. EUHYHMoMYHmZQtDe
    EUHYHMoMYHmZQtDe
    3Jrxx2QT1hOKvYfK
    QPswhfhlMOBus4Xt
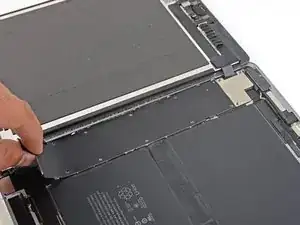
    • Swing the display assembly towards the right of the case, using the right edge as a hinge.

    • As you move the display assembly, make sure that the display ribbon cable is not being stressed.

    • Continue swinging the display assembly until it lays flat next to the rear case.

  25. OmKcSXAUbgvGwQDa
    • Use a Phillips screwdriver to remove the eleven 1.3 mm screws securing the EMI shield.

  26. pmOYYDEugngE3r5u
    • Apply a heated iOpener to the EMI shield on the logic board for one minute.

  27. e1sL5f4ExNuJAext
    e1sL5f4ExNuJAext
    QiJq5COIviJNFLjS
    2IYWhakABvD1ZxOE
    • Lift the logic board EMI shield, starting at the edge nearest the top of the iPad.

    • Slowly peel the EMI shield up from the logic board.

    • This takes a bit of force due to the many tiny clips securing the shield, and the shield may deform slightly. That's okay—try to keep the deformation to a minimum, and it will lay flat when reinstalled and screwed down.

    • Remove the logic board EMI shield.

  28. D6aqtQGXLmCYbHBt
    • Use a Phillips driver to remove the 1.7 mm-long screw securing the battery connector.

    What size is this screw?

    Austin Martin -

    i get 1.65mm with my calipers but the 1.3s read 1.25 on my calipers too, so probably a 1.7mm

    bunjamins -

  29. yQVBO6oOKlNeidgA
    yQVBO6oOKlNeidgA
    WNbapGR1pFsKRftp
    pg232afeScFRxNik
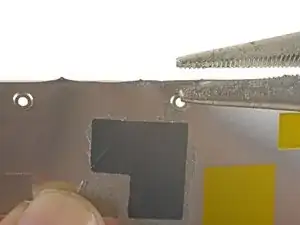
    • If the EMI shield has any sharp protrusions after removal, you should flatten them before reinstalling the shield.

    • Squeeze the sharp protrusion with a pair of pliers to flatten it.

    • Repeat the process for all sharp protrusions along the edges of the EMI shield.

  30. XpIgLlSVJMdt4NyP
    XpIgLlSVJMdt4NyP
    V1V2DyoEgl4mTn6v
    yL3XcWjTZ5XaXsLf
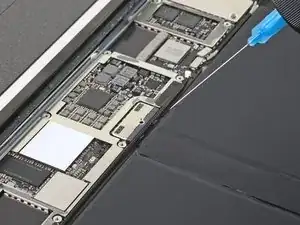
    • These photos show what the battery connector looks like underneath the logic board. Use these photos as a reference while you safely disconnect the battery.

    • Notice that the battery connector has cantilever springs on the logic board that press against the battery contact pads. Since both the logic board and battery are glued down, you'll need to slide something thin and flexible between the contact points to disconnect the battery.

    Le connecteur de batterie est il réparable si abîmé ?

    Maverick -

  31. ydsWDNC5XgN5TGkA
    ydsWDNC5XgN5TGkA
    lYxVPnwP1yejWAfd
    QgNCDMbA2bNqcQio
    • Be careful when you isolate the battery using a battery blocker. The battery contacts are easily bent or broken, resulting in irreversible damage.

    • Ensure that the iFixit logo on the battery blocker is facing up.

    • Slide the battery blocker underneath the left side of the logic board's battery connector at a 35 degree angle.

    • The battery blocker's right prong should slide between the left side of the logic board's battery connector and the battery's contact pads. The left prong should slide under the logic board.

    • Don't push the battery blocker underneath the connector or logic board with excessive force. If you're having trouble fitting the battery blocker underneath the logic board, refer to the next step for information on loosening the logic board. You can also try using a playing card to disconnect the battery instead.

    • The battery blocker or playing card should slide under the logic board without encountering any blockages. After insertion, they should rest at a 15 degree angle.

    • Leave the battery blocker in place as you work.

    le connecteur de la batterie est t’il remplaçable ou repérable si jamais abîmé ?

    Maverick -

  32. GNruVZHL1TYb2igd
    GNruVZHL1TYb2igd
    xlWNIlPRyuIaf3DP
    • If the battery blocker doesn't easily slide under the logic board, follow these steps to partially loosen the logic board from the frame:

    • Apply a few drops of high-concentration (90% or higher) isopropyl alcohol under the logic board to the left and right of the battery connection.

    • Wait one minute for the isopropyl alcohol to weaken the adhesive under the logic board.

    • Try to insert the battery blocker. If the logic board doesn't easily lift up, apply a few more drops of isopropyl alcohol.

    • This doesn't apply when using the playing card method to disconnect the battery because the playing card is only inserted between the battery connector and the battery contact pads.

  33. SSnJJGWG4QmSor5T
    • Use a Phillips screwdriver to remove the three 1.3 mm Phillips screws securing the display cable bracket.

    i think we need to talk about the battery situation here. apple change up the style of battery connector on this model as well as some others. if someone can add to this list and add the appropriate photos in the right spot should help someone else. the battery tabs are open towards the battery side and inserting a tool in this area can pry them open further and damage or rip off the tab. some have found that by lifting on either side of the battery tab, they would not even encounter the tabs.

    greg -

  34. 1a4ywPCBXTXe1uPJ
    1a4ywPCBXTXe1uPJ
    NQOaPfW4OXpa5vek
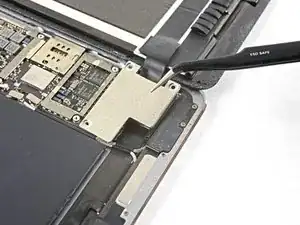
    • Remove the display cable bracket.

    A tab was folded over a connector of some sort on the bottom side. I found it was a better to pull from the top to the bottom to fold the tabs slightly to remove this cover.

    rosecitymech -

    Actually it helps to move the cover slightly towards the bottom of the iPad as that disengages to tabs…

    DeeAnn Hopings -

  35. N3WqLqmlprqjmhha
    N3WqLqmlprqjmhha
    vyNRHkW1HFHRt5rb
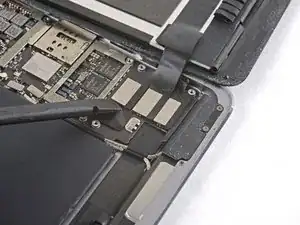
    • Use the flat end of the spudger to disconnect the display assembly connector from the motherboard socket.

  36. 6ym1twSljAhoSG46
    6ym1twSljAhoSG46
    FMHLJUerOdlvCIJh
    • Repeat the previous step for the two remaining connectors.

  37. VfYWrFtvNprHjYIC
    VfYWrFtvNprHjYIC
    C5LVpSEBGFwHVbQb
  38. d1RZJlFU2CIZr4Hq
    d1RZJlFU2CIZr4Hq
    iCulgDXlAdAXgDeq
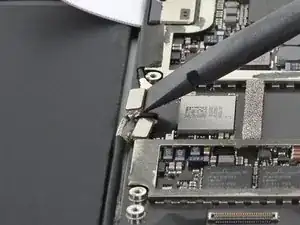
    • Use the flat end of a spudger to disconnect the right antenna's coaxial connector from its socket.

    • To reinstall, hold the connector in place and gently press straight down. The connector will “snap” into its socket.

  39. 6BSXyup2iXhyPWWH
    6BSXyup2iXhyPWWH
    B6LYMXieTVAXDPMY
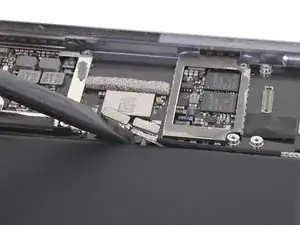
    • Use the flat end of a spudger to disconnect the left antenna's coaxial connector from its socket.

    • To reinstall, hold the connector in place and gently press straight down. The connector will “snap” into its socket.

  40. YLXWISg3dtNPoXII
    YLXWISg3dtNPoXII
    jukpIAibXcrZQLAv
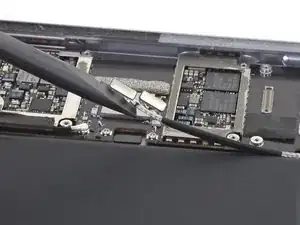
    • Use the flat end of a spudger to lift the bundled left and right antenna cables away from the frame.

    • Be careful not to puncture the battery with the spudger.

    • The sticker bundling the antenna cables together is lightly adhered to the frame.

  41. kRNIv6lJZZqXpfb1
    • Use a pair of tweezers to remove the adhesive that was securing the bundled antenna cables to the frame.

    • Take care not to damage the antenna cables with the sharp tips on the tweezers.

    • During reassembly, apply pre-cut adhesive to the bundled antenna cables to secure them to the frame.

  42. xagxeCMtFXeEl2TC
    xagxeCMtFXeEl2TC
    djlFKRKZVX3TkGIg
    • Use a pair of tweezers to peel up the sticker bundling the left and right antenna cables together.

  43. tEQcXTBjPICIXAxg
    tEQcXTBjPICIXAxg
    RJT2f6WIEkX5VvyF
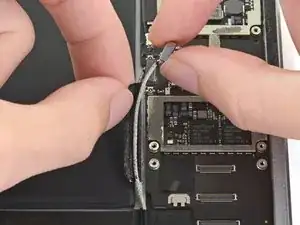
    • Peel the right antenna cable off of the sticker.

  44. 2Kfc6TxTsDx1dJ54
    2Kfc6TxTsDx1dJ54
    UavUsjVpXYhhFJhv
    • Use a pair of tweezers to lift up the small sticker near the lower right speaker securing the right antenna to the frame.

  45. jkEaMnFO3DYWoJrO
    jkEaMnFO3DYWoJrO
    nFDxXCdk6bGOcoxi
    PNLsogwCbaeRp3fw
    • Use the pointed end of a spudger to detach the foam spacer adhered to the second right antenna sticker.

  46. 2jyDlBRndyVxQrDI
    • Remove the foam spacer from the second right antenna sticker.

  47. aSEVboi4sEKvFFoo
    aSEVboi4sEKvFFoo
    rdvPgT2T3IrfInns
    • Use a pair of tweezers to detach the large right antenna sticker between the logic board and the antenna.

Conclusion

To reassemble your device, follow these instructions in reverse order.

Kyle Smith

Member since: 01/02/21

33960 Reputation

0 comments