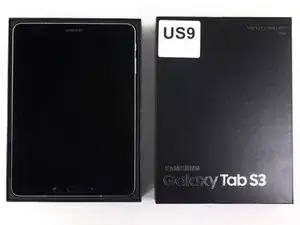
Introduction
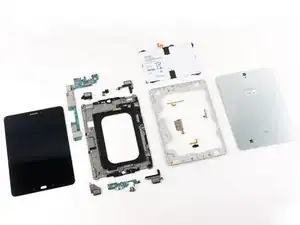
In order to replace any internal components on the Samsung Galaxy Tab S3, both the rear case and front panel must be removed. Both of these parts are secured by strong adhesive, making it a headache and yielding a repairability score of 4 out of 10.
-
-
The rear glass panel is secured in place by a large amount of adhesive.
-
In order to separate the adhesive, the rear panel needs to be heated, pulled up by a suction cup, and split with opening picks.
-
The removal process was tedious, challenging, and new adhesive will be needed to replace the panel.
-
At this point, nothing can be removed other than 8 screws that secure the two parts of the midframe.
-
Although the battery is visible, it cannot be disconnected as the midframe sits above its connector. This makes repairs risky, as power is still supplied to the motherboard.
-
-
-
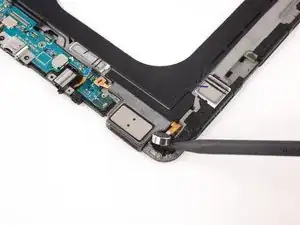
After removing the screws from the rear, the front panel must be removed.
-
Like the rear panel, the front panel is secured by a large amount of adhesive and requires heat, suction cup, and opening picks to separate.
-
There are components on the display that could be damaged in the removal process.
-
There are some display cables that could be damaged if the front panel is ripped off too aggressively.
-
-
-
Removing the home button is challenging, as there is a delicate acrylic slot glued around the button. It is almost impossible to remove this non-destructively.
-
With all the screws removed, the midframe can separate into two different pieces by unseating clips that hold them together.
-
-
-
One piece of the midframe houses the microSD slot, the volume buttons, and copper pads.
-
The microSD slot is secured by friction, where the volume button and copper pads are secured by a small amount of adhesive.
-
-
-
The battery can finally be removed. After the large amount of adhesive encountered thus far, it is a relief to find the battery is not secured by adhesive.
-
There are five Phillips screws holding the battery in its place. The battery can be lifted out of its slot on the midframe after the screws are removed.
-
-
-
The haptic feedback vibrator is soldered to a speaker that is held in place by adhesive.
-
There are four speakers that are all mounted to the midframe with adhesive. Prying with a spudger can free them.
-
The cameras are connected to the motherboard with press connectors, and are secured by friction.
-
The headphone jack is modular and held in place by the screws that secured the midframe. This is a good design feature as headphone jacks undergo wear and are more likely to need replacement.
-
-
-
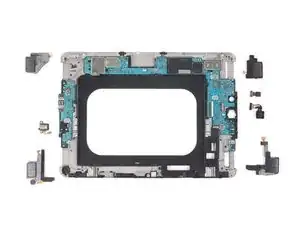
The motherboard, daughterboard, and extra antenna board were held in place by the two parts of the midframe.
-
The boards can be removed with the speakers removed and all the connectors disconnected.
-
-
-
The Samsung Galaxy Tab 3 earns a repairability score of 4 out of 10 (10 is best).
-
Many components (including the headphone jack, speakers, and micro SD slot) are modular and can be replaced.
-
All screws are Phillips #00 screws.
-
The battery is held in place by screws, not adhesive. It is very difficult to access, however.
-
In order to repair or replace anything, both the front and rear panel need to be removed.
-
The front and rear panel are secured in place with a lot of adhesive, and are extremely hard to remove.
-


7 comments
Thanks iRobot for the very great information
Great information for this new Galaxy Tablet.
Is it possible just to change the glass of the display? My item is broken but the display is ok and still working.
One repair shop told me that the touchscreen is not separated from the glass so I have to pay like 400 $ for a new screen !!!
Sinnbart -
My samsung is a 9.6 SM-T567V my husband change my cracked screen but now the tablet dot come
Ich habe Schritt 1-3 übersetzt und gespeichert - aber es ist nicht hier… Egal wichtig ist mir, daß der Schritt 3 vorgezogen wird, denn um an den Akku und seine Anschlüsse zu gelangen, muß dieser nach vorn herausgedrückt werden
(Überlegung: vielleicht kann man den Mittelrahmen vor dem Einbau an der Stelle mit den Anschlüssen unterbrechen und mit Klebeband fixieren, damit bei einem späteren Wechsel des Akkus nur das Band entfernt werden muß um an die Anschlüsse zu kommen)
Wie dem auch sei, wenn das Frontglas bricht, hat sich das Entfernen des Rückteils erledigt….
klement, herbert -