
Introduction
This guide will show how to remove the faceplate and casing from the Nest Hello.
-
-
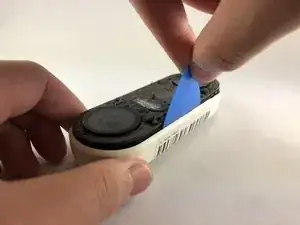
Insert the pick between the black faceplate and white casing of the Nest Hello.
-
Pry the faceplate away from the device with the opening pick.
-
Completely remove the faceplate from the device, do not be afraid to pull hard.
-
-
-
Peel back the cover stickers and use the Phillips #000 screwdriver to remove the four screws.
-
-
-
Insert opening pick between the white casing and the black internal circuitry and pry it out.
-


Conclusion
To reassemble your device, follow these instructions in reverse order.

One comment
Are Replacement parts available anywhere? Can’t seem to find anything… thanks!