Introduction

Use this guide to replace the battery in your Moto G Power (2020).

  1. NlNvYg4aErSADkqc
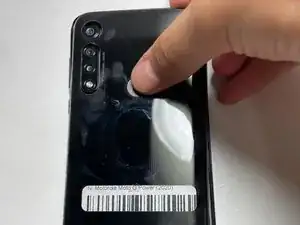
    • Place a suction cup on the back of the device.

    • Open up the back of the device by sliding the opening pick into both sides of the phone.

    • Do not remove the back panel completely; you must disconnect the fingerprint sensor first.

  2. FJKWh1To5AwVJiSB
    • Put pressure on the fingerprint sensor with your finger to detach it from the back panel.

    • You may have to use significant force to get the circular sensor off the panel.

  3. JmuULJFCOcDaiIIC
    • Completely remove the back panel from the device.

  4. VkO3KWkVeZkYEV1U
    • You must remove the back cover of the phone to access the fingerprint sensor

    • Using T3 Screwdriver, take out total of 9 screws(about 2.2mm Torx)

  5. 34oWAtPjn23Dackc
    34oWAtPjn23Dackc
    nN3E3wqBpTPEMnSX
    QFjVx2Lk31sQ1pnZ
    • Remove the back cover using the spudger

    • You may need to leverage against the conner to lift up the cover

    • Carefully place the cover in a safe place

    • DO NOT use excessive force when lifting up the back cover. You might damage other component of the device

  6. 154NYTRJnCcXFifK
    • Disconnect the fingerprint sensor from the logic board of the device

    • Use spudger to lift up the cable to disconnect the fingerprint sensor

    • WARNING: Be careful when handling the sensor cable, it's one of the easiest component to be damaged

  7. g5MWjPvDaqnxYKEt
    • Finally, take out the fingerprint sensor from the device!

  8. JecmD1qkVPBiTUBE
    • If present, carefully remove the protective tape using a plastic spudger as shown, ensuring the delicate flex cable is not torn in the process.

    • Be careful to not puncture or bend the battery! If punctured it will violently combust, potentially causing damage to the device and your skin/clothing.

  9. JBvJ2qeL5LxD3gdy
    JBvJ2qeL5LxD3gdy
    a6GebrDKJBU1QPOZ
    • Use a plastic spudger or non conductive tweezers to disconnect the battery cable from the motherboard.

    • Be gentle and ensure the tweezers are not pointed/sharp; The flex cable is easily torn and the battery connector should not be shorted!

  10. fiGGsrjulYXc2GwF
    fiGGsrjulYXc2GwF
    qlcRixYXjTvfgTfk
    • Slide an opening pick under the battery and gently work it back and forth to separate the adhesive connection to the frame.

    • The adhesive is quite strong and will require careful attention to apply enough force to remove the battery without damaging it in the process.

  11. 6DMr6bEIr3DgRXbw
    • Once the battery is free from the frame, insert the replacement battery and connect it to the motherboard.

    • (Optional) Two-sided tape can be used to secure the battery to the frame.

Conclusion

To reassemble your device, follow these instructions in reverse order.

Harry Jung

Member since: 23/06/22

610 Reputation

0 comments