
Introduction
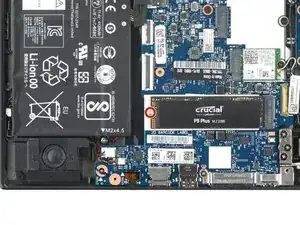
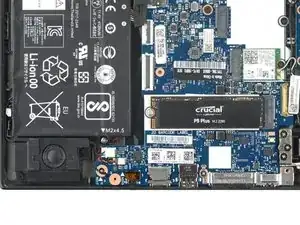
Follow this guide to replace or upgrade the Solid State Drive (SSD) in your ThinkPad X395. Note that a thermal pad helps the SSD dissipate heat more effectively. Remember to keep the original thermal pad, or have a replacement ready.
Before you perform this repair, back up your existing SSD if possible. If you’re replacing the SSD where your operating system is installed, familiarize yourself with a disk cloning utility so you’ll be ready to migrate your data to the new SSD.
-
-
Orient your laptop so that the screen's silver hinges are closest to you.
-
Insert an opening pick between the back cover and the device body near a hinge corner.
-
Pry upward to release the retaining clips. Listen for a loud click when each clip releases.
-
-
-
Insert the opening pick between the back cover and the device body at the other hinge corner.
-
Pry upward on the cover to release additional clips.
-
-
-
Lift and remove the cover up from the laptop, starting with the edge nearest to you.
-
Shift the cover side to side if the center clip feels stuck.
-
-
-
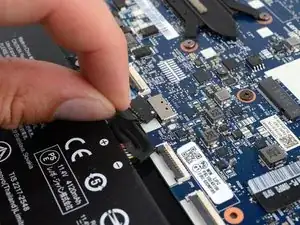
Grab the battery pull-tab on the head of the connector.
-
Pull the connector out of its socket in the direction of the cable.
-


To reassemble your device, follow these instructions in reverse order.
Take your e-waste to an R2 or e-Stewards certified recycler.
Repair didn’t go as planned? Try some basic troubleshooting, or ask our Lenovo ThinkPad answers community for help.
