Introduction

  1. NFtYMIq2pIVe1NLS
    NFtYMIq2pIVe1NLS
    f3HPZLtAIooGCgUh
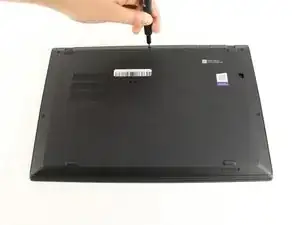
    • Use a Phillips #0 screwdriver to unscrew the five screws that secure the back cover to the laptop.

    • The screws do not completely come off from the back cover. Loosen until the screws are completely loose.

  2. HKMFZVKrjam3PWWH
    HKMFZVKrjam3PWWH
    6ZP1DMLSvgYbwIhX
    • Use a Jimmy to lift the cover directly up off of the locating pins.

    • Though a metal opening tool is shown in the image, we recommend using plastic opening tools to minimize any cosmetic damage.

    • Remove the back cover.

    • If you encounter resistance when lifting the cover, revisit the screws to see if any of them are still threaded on to the device.

  3. 2xBAZNGktDaK54Lm
    2xBAZNGktDaK54Lm
    IIjEKPgWLiLkttCO
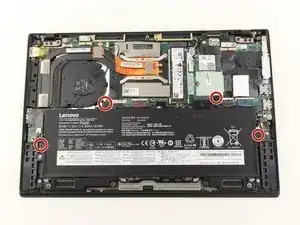
    • Use the Phillips #0 screwdriver to remove the four 5 mm screws that secure the battery to the laptop frame.

    The screw holes do not align 100%. Dont tighten all the screws as you re-insert them, leave just a little bit of play so that you can push the battery slightly until all the screws fit nicely, then tighten them. A little bit of DIY wisdom helps here. :-)

    Michael Dauer -

  4. OBGNfvQoRcUkViXt
    • Take out the battery by lifting it from the bottom edge of the laptop, and then pulling away from the motherboard.

    Recommend changing the command language to lifting from the TOP edge, as the BOTTOM edge is secured.

    Alexander Van Auker -

    You forgot to tell people to disconnect the battery from the motherboard before removing…

    Becky -

    Agree with both comments above: lift from top left and top right of battery. This disconnects it and it lifts out and away.

    Marc G -

    In my 6th generation X1 Carbon there are two wires that are routed on the edge of the battery and have to be moved out of the way. These are antenna cables, be gentle with them, kinks and indents change their high frequency properties and may lead to problems with your WIFI.

    Michael Dauer -

  5. OsJK36lVhWXeM3KO
    • Use a PH0 screwdriver to remove the four 2mm screws holding the speakers in place.

Conclusion

To reassemble your device, follow these instructions in reverse order.

Aaron J Houston

Member since: 03/10/22

73 Reputation

0 comments