
Introduction
Lenovo Legion 7i 2020 models all models of this year product line similiar repair.
Do not under estimate this simple replacement.
Parts
-
-
Remove bottom panel of laptop removing all the screws which should be differing sizes. First Ground your self to remove static from your working surfaces (hands, gloved hands preferable) touch the heat sink or vapor chamber to do this. Now to disconnect battery connector from mobo con as seen in video. You do not need to remove entirely out of it.
-
-
-
Since cannot post vid more than 30 seconds. I Will include link to lenovo made video depicting them removing said device's Mylar bezel. Bezel removal should not be rushed and be meticulously gentle during the unclipping of the plastic clips. Be extra careful when rounding the inner edges of the bezel to not mess with top camera module
-
Do not put the pick or spudger too deep into the bezel during removal in that area at the top
-
-
Go to bezel removal on the list in the lenovo website.
-
-
-
These next steps are delicate as if you haven't unplugged power supply and battery from mobo connector problems can arise! CAUTION! do not proceed if you have no done those two things already.
-
First you will remove the bottom as seen in video. I have broken up the lenovo vid because this next 7 steps are so important to this.
-
-
-
removing the special tape will not be able to be reused unless you want to risk it not sticking properly so double sided special tape/equivalent should be bought from the panel seller or of similar products seller.
-
Product i found most similiar. The dimensions listed should be the near the tape you do end up buying. remeber tip use tweezers to remove the double sided tape protector skin if it is a very small sized one you have gotten.
-
-
-
Opposite side panel adhesive removal.
-
technique shown is correct but the tape will not be reusable.
-
if really desperate you can reuse tape if pulled out correctly slowly but takes the patience of not many have
-
-
-
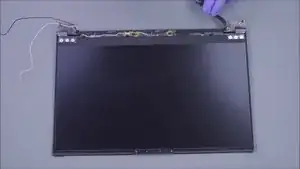
Use suction cup as shown and slowly lift the panel off the top cover of laptop to be able to get hands on with the EDP cable.
-
Lift tape and remove cable as shown while holding panel up and be careful not to pull panel out until then as damage can occur or something internal be unplugged.
-
CAUTION: not said in video and done in it they are using metallic tweezers to remove cable do not do this use plastic pic or anything not electriclty conductive and pull up cable detach catch and remove the edp cable slowly.
-
-
-
INSTALL new tape for new panel attachment.
-
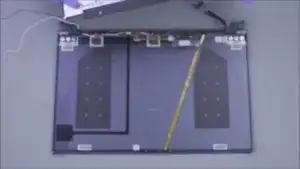
Tapes shown are not full length use approx. length of tape of about 7- 5in atleast to make sure there is enough mounting pressure to remain panel in place. Rember to check that adhesive is strong enough to do its job before finishing this project or you will have to replace them.
-
We almost there :)
-
-
-
Connecting the new panel replacement
-
Connect EDP cable. Make sure is fully seated and then flush EDP cable clear tape for adding adhesion to port.
-
make sure lock in cover is fully closed on edp cable as plugged in.
-
-
-
Make sure screen is flush on top Top lid tape its being adhered to.
-
The vid show additional that doesn't pertain because we did not remove entire top half of laptop from the main chassis so to finish up you only need put CAREFULLY the mylar bezel cover after you plug in battery and check panel is working and functional. Finish it and good luck Estmated time of replacement 1.30hrs Take your time and do be careful
-


make sure to not put on bezel until you put re-connect battery and check monitor is powered up correctly. then put bezel back in carefully plastic clips are delicate then, To reassemble your device, follow these instructions in reverse order.
