Introduction

Follow these instructions to use an Anti-Clamp to open a device.

  1. D54NuMTREEanNvSg
    D54NuMTREEanNvSg
    tTBQtQlTwLMyEUwd
    • Pull the blue handle toward the hinge to disengage opening mode.

    • This allows you to move the arms of the Anti-Clamp freely.

    • The handle may be stiff the first time you disengage opening mode. Don't be afraid to pull on it until it snaps into position.

  2. 6qv5VnRJJFR5YUSw
    6qv5VnRJJFR5YUSw
    ppk3qoSsGFoqPuaH
    • Center the suction cups over a smooth area of the device, near the edge.

    • Avoid buttons, gaps, seams, and speakers, as they will prevent a good hold.

    • For stubborn devices, use an iOpener or heat gun to soften the adhesive before and during the opening process.

  3. Y5ZTUgTohWWqJmZP
    Y5ZTUgTohWWqJmZP
    Ujl6qGqhTSPVKryp
    • Push down on the cups to apply suction to the desired area.

    • If your device has cracked glass or a textured surface, use a layer of packing tape to get a better grip.

    • Ensure both cups are applied properly before continuing.

  4. bEmDKjgQ2wnEDpSe
    bEmDKjgQ2wnEDpSe
    NbmBKnHGvPFEPrAC
    Q5OyxbBjV6oilTZS
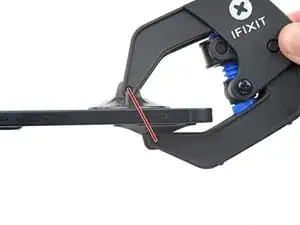
    • The Anti-Clamp works best when its cups are aligned with each other.

    • Improper alignment may cause the cups to separate prematurely.

    • If you find that the surface of your device is too slippery for the Anti-Clamp to hold onto, you can use packing tape to create a grippier surface.

  5. nqPCcQrfjb2HN2jC
    nqPCcQrfjb2HN2jC
    FK5EHBuRXZDNQ42D
    • Push the blue handle away from the hinge to engage opening mode.

    • This prevents the arms of the Anti-Clamp from moving and allows the handle to pull the arms apart.

  6. IoYV2ZWs6YM1ItGX
    IoYV2ZWs6YM1ItGX
    vltCLbscqBY5oeTL
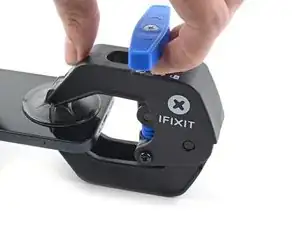
    • Turn the handle clockwise until you see the cups start to stretch.

    • Wait one minute to give the adhesive a chance to release and present an opening gap.

    • If you're having trouble making a gap, rotate the handle clockwise half a turn and wait another minute.

    • Don't crank more than a half a turn at a time, and wait one minute between turns. Let the Anti-Clamp and time do the work for you.

  7. uNWJ26lQPICIWBuF
    uNWJ26lQPICIWBuF
    krKi4eZQTBcwjkdu
    olKgneE4reRmjDsE
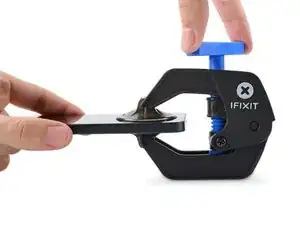
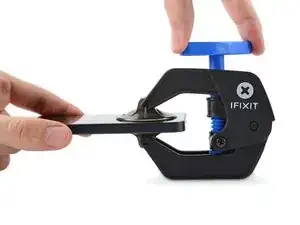
    • Insert an opening pick when the Anti-Clamp creates a large enough gap.

    • Slide the pick along the perimeter of the device to separate the adhesive.

  8. ZEFreMEXvLsaJORB
    ZEFreMEXvLsaJORB
    cVHETtkCJRtQ5Qhb
    • Repeat the opening and slicing procedure until the device is open.

    • Be mindful of any cables when you completely remove the component.

    • To remove the suction cups, disengage opening mode and pull on the tabs located on the cups themselves.

Conclusion

For other general electronics skills guides, click here.

For a fun way to decorate your Anti-Clamp, click here.

Alex Diaz-Kokaisl

Member since: 16/01/22

54801 Reputation

4 comments

Very clear step-by-step guide. The next time I do a battery replacement I intend to use one of these.

4surferboy -

Engaging the Opening Mode the first time takes a bit of a push, don't be afraid, keep pushing until you hear a click. Seems to be easier to engage after the first time.

Ed Reeder -

Hi Ed,

Thanks for the helpful feedback! I've implemented your note into the guide step.

Arthur Shi -

Looks like an answer to a problem that I don't have right now but I plan to purchase one of these before I do any more battery replacements.

glynn -