Introduction
This guide will teach you how to replace/install the front panel assembly including: the front panel glass, button assembly, earpiece speaker etc.
Tools
Parts
-
-
Place the device on a flat surface (with the headphone outlet facing you). Using one of your fingers, place the tip of your finger over the highlighted spot (as shown in the second picture). Next, pull the back cover upwards.
-
If the first method is too difficult, use the plastic opening tool in order to complete this step. Stick the plastic opening tool inside of the gap. (The gap is located on the top of the device which is highlighted in the second photo). Using the plastic opening tool pull the back cover upwards until the back cover pops off.
-
-
-
Lay the device on a flat surface with the screen facing downward. Use one hand to hold the device down in place. With your free hand use one of your fingers and stick it in the gap (as highlighted in the photo)and pull it up towards you.
-
The gap is located on the left side of the device in the upper left hand corner and the on the right side of the device in the upper right hand corner.
-
If the battery is not coming out with this technique, use the plastic opening tool to stick it in the gap and pry it up towards you.
-
The battery will pop out.
-
-
-
At the lower right hand corner of the phone (as highlighted in the picture as shown) use one hand to hold the device in place and use your finger (on your free hand) to push the micro SD card inwards until you hear a "click" sound and it pops out.
-
If that method is difficult, use the plastic opening tool to push the micro SD card inwards and it will make a "click" sound and pop out.
-
-
-
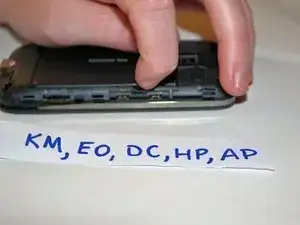
Use the plastic opening tool and place it in the gap by the chrome bezels which are located on both sides of the device. Pull the plastic opening tool downward so that the plastic case will pry open. Start prying open the device and work clockwise.
-
-
-
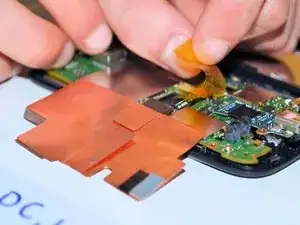
With one hand holding the device in place, use your free hand to flip open the RF shield.
-
Peel the three pieces of silver metallic tape off of the logic board.
-
Do not peel off the two pieces of tape, that are located on the straightest edge of the RF shield closest to the edge of the phone.
-
-
-
Peel back the yellow tape. (located in the middle red highlighted box as shown)
-
Use your fingers to peel the two connectors on the sides away from the motherboard.
-
-
-
Unscrew the four 1.2mm Phillips screws with the Phillips #00 screwdriver from the motherboard.
-
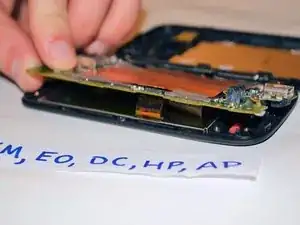
Place the four screws in a safe place and then carefully lift up and remove the motherboard, then set it aside.
-
-
-
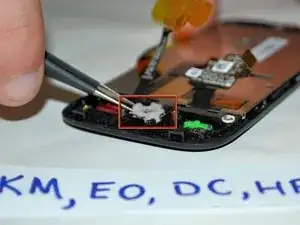
Use tweezers to grab the white sides of the trackball bracket and remove from the phone.
-
If this method is unsuccessful then place the device over your hand (with the screen facing downward). Make sure that the trackball is positioned directly over your hand. Now turn the device over carefully and the trackball will fall out. That will be the only thing that is loose so make sure that you are able to catch the trackball when it falls.
-
-
-
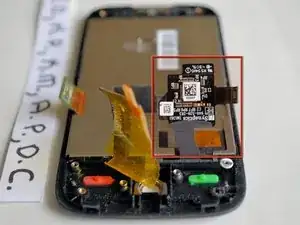
Stick the plastic opening tool in the gaps around the LCD and pry it up out of the phone.
-
Use the plastic opening tool to pry all of the corners of the LCD.
-
-
-
After prying off the LCD screen with the plastic opening tool you will be able to replace the front screen.
-
To reassemble your device, follow these instructions in reverse order.


