Introduction

This repair guide was authored by the iFixit staff and hasn’t been endorsed by Google. Learn more about our repair guides here.

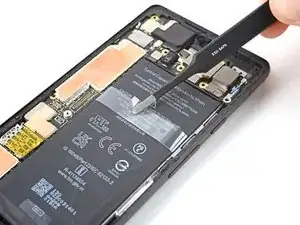
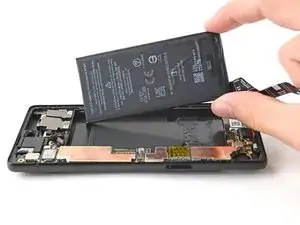
Use this guide to replace the battery in your Google Pixel 6a.

Note: this guide was made using the Verizon GB62Z model, which features a 5G mmWave antenna. Ignore the steps that include the 5G mmWave antenna if you have a different model, as the procedure is identical.

For your safety, discharge the battery below 25% before disassembling your phone. This reduces the risk of fire if the battery is accidentally damaged during the repair. If your battery is swollen, take appropriate precautions.

You'll need replacement adhesive in order to complete this repair.

  1. XBVUE1Uv6VUMgXwN
    • Completely power off your phone before you begin.

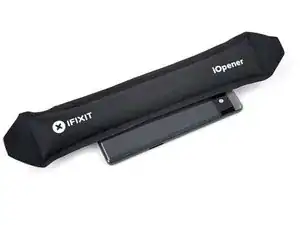
    • Heat an iOpener and apply it to the right edge of the screen for two minutes.

    • A hair dryer, heat gun, or hot plate may also be used, but be careful not to overheat the phone—the display and internal battery are both susceptible to heat damage.

    What's a good temperature to set to hotplate to for a repair like this?

    David -

  2. Ddj6QlmyySZgoW6a
    Ddj6QlmyySZgoW6a
    hUPVuKPNoCOJIqv2
    UhmIq1ec1LqlbRRu
    • While you're waiting for the adhesive to loosen, take note of the following:

    • Screen seam: This seam separates the screen from the rest of the phone. Do not pry at this seam.

    • Bezel seam: This is where the plastic bezel designed to protect the screen meets the frame. It's held in place by plastic clips. This is where you should pry.

  3. XDaaq12ecnEIq4yD
    XDaaq12ecnEIq4yD
    alGoFZ4wLLdAvZAw
    BRy5TKDEcKNO3UDD
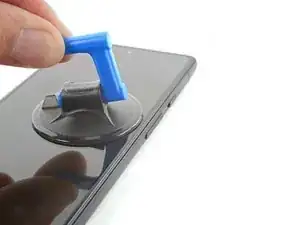
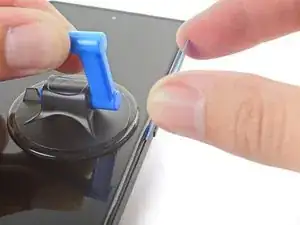
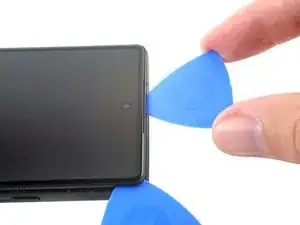
    • Apply a suction cup to the screen, as close to the center of the right edge as possible.

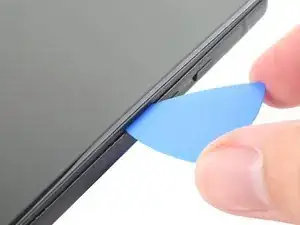
    • Pull up on the suction cup with strong, steady force to create a gap between the bezel and the frame.

    • Insert an opening pick into the gap.

    • Depending on the age of your phone, this may be difficult. If you're having trouble, apply more heat to the edge and try again.

    • If your display is badly cracked, covering it with a layer of clear packing tape may allow the suction cup to adhere. Alternatively, very strong tape may be used instead of the suction cup. If all else fails, you can superglue the suction cup to the broken screen.

    Would be helpful to have alternative solutions offered here for those with shattered screens, since suction cups don't work.

    Paul York -

    Hi Paul.

    Thank you for your comment! I have updated the step to provide an alternative solution for shattered screens.

    Alex Diaz-Kokaisl -

    Would just like to note that in my particular case even tape or super glue did not work, due to the screen being shattered right along the spot where you need to place the suction cup. I ended up resorting to inserting a razor blade into the seam to open it just enough to insert the pick.

    mkirwin -

  4. aKADaMwDF1Su2ytM
    aKADaMwDF1Su2ytM
    ojCAATkuclM4RkHa
    CNQEOHFpaOTP5Nlf
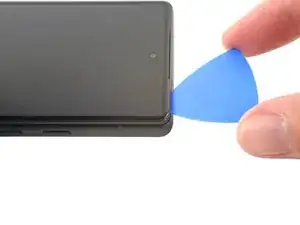
    • While still applying suction, pivot the pick upwards to a steep angle.

    • Carefully push the pick in while prying to reposition the opening pick into the bezel seam.

    • Only insert the pick up to 3.5 mm to avoid damaging the internals.

  5. fm3oG32vJ2EEBhuc
    fm3oG32vJ2EEBhuc
    gBarY33TTTBZCBZS
    T1RrWIEZYKqCKLue
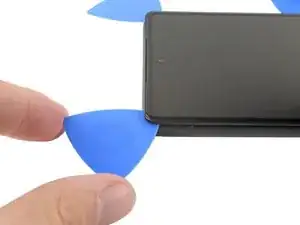
    • Slide the pick along the right edge to release the plastic clips securing the bezel to the frame.

    • Position the pick at the top-right edge before moving to the next step.

  6. dfU45x4Vk5SuSwn1
    dfU45x4Vk5SuSwn1
    GEBiXPOdSYHlB2oP
    QbSiwkPDRt5wPR2F
    • Rotate the opening pick around the top-right corner of the phone to release the clips.

    • Leave the opening pick in the top-right corner to prevent the clips from re-locking.

    • Only insert the pick up to 4 mm to avoid damaging the internals.

  7. MsjU6gcvUNhlBLuU
    MsjU6gcvUNhlBLuU
    LUT1jGbhZPrJ4FFO
    FL2DT6sQmAqd2TjO
    • Insert a new opening pick into the gap you just created.

    • Slide the pick along the top edge to release the clips.

    • When slicing around the front camera, only insert the pick up to 3 mm to avoid damaging the lens.

  8. NkLX4XJsx4UEFs6e
    NkLX4XJsx4UEFs6e
    yHuNMCvi4SaACvqa
    odm622mGQ4Njy6KU
    • Rotate the opening pick around the top-left corner of the phone to release the clips.

    • Leave the opening pick in the top-left corner to prevent the clips from re-locking.

  9. NLdAYs426UBCVRRt
    NLdAYs426UBCVRRt
    LKjkWexcYPlXuaoI
    rOTvEBRGLhXVPsqb
    • Insert a new opening pick into the gap you just created.

    • Slide the pick along the left edge to release the clips.

    • Only insert the pick up to 3 mm to avoid damaging the internals.

    • Repeat the rotating and sliding procedure for the remaining edge.

    • At this point, the screen should be separated from the frame. If there's still resistance around the edges of the screen, use an opening pick to release any remaining clips.

  10. BwXKiaQCfotybFTs
    BwXKiaQCfotybFTs
    1R1JaSBgkHIBHQ21
    sxfrVYeyPct14MLK
    • Don't try to remove the screen all the way yet. It's still connected to the frame by a flex cable.

    • Lift the right edge of the screen up and towards the left side of the device, like opening a book.

    • Rest the screen upside down and parallel to the frame before continuing.

    • Don't twist the screen or move it too far away from the frame to avoid damaging the flex cable.

  11. 4aDiGqShEoknkpOW
    4aDiGqShEoknkpOW
    OAULhXU5sTSSnHiC
    nUiacYiY3BDiH12K
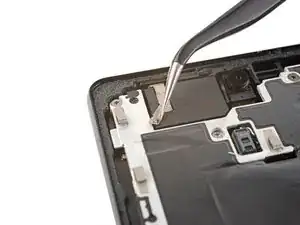
    • The display cable bracket is secured with metal clips.

    • Use tweezers to bend the left side of the bracket upwards, releasing the metal clip.

    • Remove the display cable bracket.

  12. 3L5D4qAJI4iQK3yD
    3L5D4qAJI4iQK3yD
    ylWfImyWZSXKtZTw
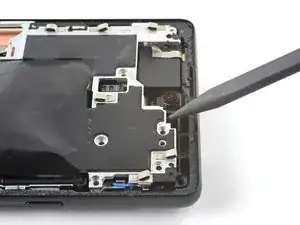
    • Use a spudger to pry up and disconnect the display cable's press connector.

    • To re-attach press connectors like this one, carefully align and press down on one side until it clicks into place, then repeat on the other side. Do not press down on the middle. If the connector is misaligned, the pins can bend, causing permanent damage.

    be incredibly careful when removing and installing the cable, the many tiny components along the edge and under the tab are incredibly fragile. This is one of, if not, the most important step.

    Jeffrey Leon -

  13. Pp5D6dNHPClDTgX6
    Pp5D6dNHPClDTgX6
    UIGvqI1dpPneopCI
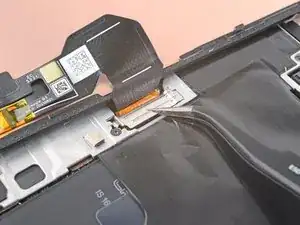
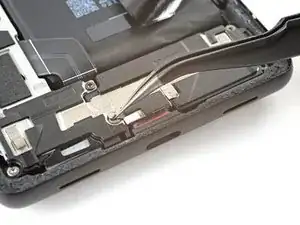
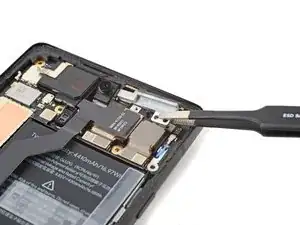
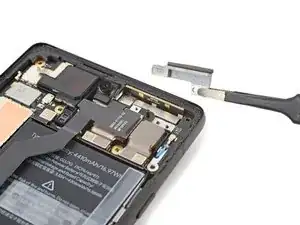
    • Use tweezers to peel back the silver tape connecting the midframe and the top speaker.

    • Don't completely remove the tape. You only need to remove the bridge between the midframe and the top speaker.

  14. RGhKyOC2BcnnTsS6
    RGhKyOC2BcnnTsS6
    nmbIWj5VWMAj1aMv
    cSqbQflEpcJRbubk
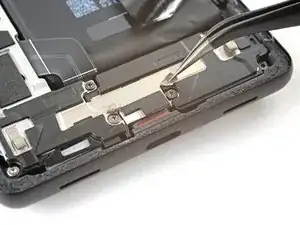
    • Use tweezers to peel back the tape covering the two screws on both sides of the USB-C port.

  15. 15hDyTagUPjxtEDM
    15hDyTagUPjxtEDM
    XUW6GVJv3XYTkCgA
    • Use a T3 Torx screwdriver to remove the 16 screws securing the midframe to the frame:

    • Nine 4.3 mm screws

    • Four 2.9 mm screws

    • Two 4.9 mm screws

    • One 4.6 mm screw

  16. k3SHiercjOpogMdB
    k3SHiercjOpogMdB
    nryLe1woWtmWVx2q
    • Insert a spudger between the top of the midframe and the frame, near the front camera.

    • Pry up with the spudger to release the top of the midframe from its clips.

  17. kgqba6dsG4cQ5nDH
    kgqba6dsG4cQ5nDH
    vWADQTBob21B32ZE
    • Insert a spudger between the bottom left of the midframe and the frame.

    • Pry up with the spudger to release the bottom of the midframe from its clips.

  18. VDZmNYI4wJDsBcQY
    VDZmNYI4wJDsBcQY
    qOsjJjHnhtQWCT3L
    • Remove the midframe.

    • You may feel a bit of resistance. This is normal, since the midframe is slightly bonded to the heat sink with thermal paste.

    • During reassembly, this is a good point to power on your phone and test all functions before sealing it up. Be sure to power your phone back down completely before you continue working.

  19. IMIotWuoChrJTOHx
    IMIotWuoChrJTOHx
    xSlLYvU4f4LxN6nk
    RdiDld36jwFheLqL
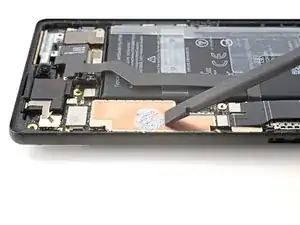
    • Use the flat end of a spudger to scrape off the thermal paste.

    • Clean any remaining thermal paste with isopropyl alcohol and either a coffee filter or a lint-free cloth.

    • Repeat the cleaning process for the thermal paste on the midframe.

    • During reassembly, follow this guide for reapplying thermal paste to your device.

  20. enrNjRO3kLQTsFh6
    enrNjRO3kLQTsFh6
    gbBWXIS4jWiwMbpN
    • Use a spudger to pry up and disconnect the battery's press connector.

  21. TRvTAMmXgNGWavbZ
    TRvTAMmXgNGWavbZ
    GsHJmtTKCPiwO4rO
    • If your device doesn't have a 5G mmWave antenna, skip the next four steps.

    • Use a T3 Torx screwdriver to remove the 2.9 mm screw securing the 5G mmWave antenna bracket.

  22. QWn4KBymQOCBZFip
    QWn4KBymQOCBZFip
    pTaVZeGLrpJKrcQT
    JQGYn4hgfWmjkvkC
    • Use tweezers, or your fingers, to pull the bracket towards the right edge of the phone and disconnect its clip.

    • Remove the 5G mmWave antenna bracket.

  23. hTvYMEDwaFV1BiU2
    hTvYMEDwaFV1BiU2
    VDMjyVMqQs5Khosk
    • Use a spudger to pry up and disconnect the 5G mmWave antenna's press connector.

  24. KBvjohYU4ktxuVqr
    KBvjohYU4ktxuVqr
    CNWjm3RjnPXwrKDD
    • Use tweezers, or your fingers, to remove the 5G mmWave antenna.

  25. JatkQriUfi4POGNZ
    JatkQriUfi4POGNZ
    HGvd4yp2f3OQVhNU
    ZoXAVCpXvSgJM6YD
    • If your device doesn't have a battery spacer, skip the next three steps.

    • Insert an opening pick between the plastic battery spacer and the battery.

    • Slide the pick forward while prying to separate enough of the spacer to grip it with tweezers.

  26. HAcIlNJYnYkvfhIi
    HAcIlNJYnYkvfhIi
    eTRlQJRdYCRieeuw
    • Use tweezers, or your fingers, to peel the battery spacer away from the device.

  27. qbVdjvKLkcVOG5sN
    qbVdjvKLkcVOG5sN
    hDSOlKoGdFCQh2DQ
    • Remove the battery spacer.

    • If your replacement battery didn't come with this spacer, transfer it to your replacement part.

  28. kASlH2IHACWIqOJ1
    kASlH2IHACWIqOJ1
    UOpQStbRGCmVde2m
    RZXAfJHaq6Af2CJa
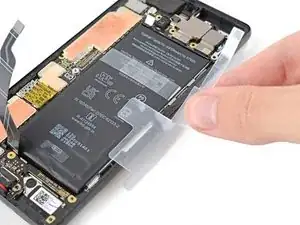
    • Use tweezers, or your fingers, to peel the plastic pull tabs away from the battery.

  29. OZmpaV4OhP1x2pAo
    • Heat an iOpener and apply it to the back of the device for two minutes.

    • A hair dryer, heat gun, or hot plate may also be used, but be careful not to overheat the phone—the battery is susceptible to heat damage.

  30. nvkZvNvNlK5bENOa
    nvkZvNvNlK5bENOa
    JJZpOKaQ3HYWEZph
    wJW1RIpHq6LTeisX
    • Pull the tabs back and forth in a sawing motion down the length of the battery to separate the adhesive underneath.

    • Work slowly. It's easy to lose your grip and accidentally pull the tab up from under the battery.

    • If you're having difficulty separating the adhesive, apply more heat and wait for the adhesive to loosen.

  31. BguhWknyGAgRMIs5
    BguhWknyGAgRMIs5
    P5mRsKsDpZvDmnxS
    t4teyTVCXCVwNFiu
    • Tilt the battery out of the device to separate the rest of the adhesive.

    • Remove the battery.

    • Do not reinstall a damaged or deformed battery, as doing so is a potential safety hazard.

    • Secure the new battery with pre-cut adhesive or double-sided adhesive tape. In order to position it correctly, apply the new adhesive into the device at the places where the old adhesive was located, not directly onto the battery. Press the new battery firmly into place.

    • During reassembly, temporarily reconnect the battery to the motherboard to help align it correctly. Disconnect the battery after it's seated.

Conclusion

Compare your new replacement part to the original part—you may need to transfer remaining components or remove adhesive backings from the new part before you install it.

To reassemble your device, follow these instructions in reverse order.

For optimal performance, calibrate your newly installed battery after completing this guide.

Take your e-waste to an R2 or e-Stewards certified recycler.
Alex Diaz-Kokaisl

Member since: 16/01/22

54801 Reputation

0 comments