![Fixing Wheel Glitch on Mouse Roccat Kone[+] Plus](../../images/https/guide-images.cdn.ifixit.com/igi/SM5jLRWrmeID6ncf.standard)
Introduction
Although the Roccat Kone[+] represents Roccat's top of the line model in the gaming mice category, it has one small weakness within the scroll wheel mechanism. It is very sensitive to dust, and after some time it will start to malfunction.
In this video you will find a short review of the Kone[+] and the manifestation of the glitch.
Before you attempt to perform this repair, make sure the glitch is actually permanent, and make an attempt at fixing it with a few blows with an air compressor.
-
-
With a heat gun/hair dryer, warm up the covers. This will loosen up the glue that keeps the glides attached to the mouse.
-
Once hot, gently try to lift the glide and work the edges.
-
Once the glides are removed, the screws are in plain sight.
-
-
-
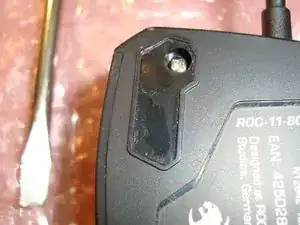
Unscrew all 4 screws.
-
Gently pull the lower and upper part in opposite directions. DO NOT USE FORCE.
-
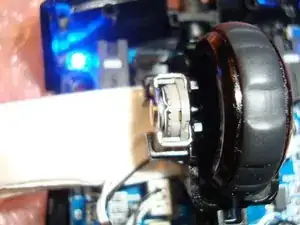
Lower and upper part are attached by 5 wires
-
You can either leave them attached or unplug the wires using the tweezers
-
I preferred to separate the two parts for better handling of the lower part, where the optical and scroll sensor are located.
-
-
-
Replug the mouse in its initial USB port.
-
Be sure to insert a small piece of cloth or tissue paper under the mouse wheel to prevent uncontrolled WD-40 leaking
-
-
-
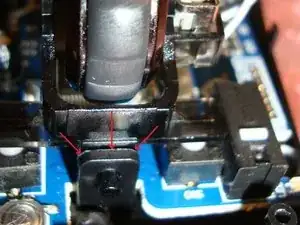
Now spray contact cleaner (ignore WD-40) directly in the space indicated in the picture. Scroll up a couple of times and scroll down a few times while spraying.
-
plug mouse in to PC, you can easily check in real time if it clears up persistent, or vanishes.
-
If this won't fix it, this probably means the scroll sensor is permanently damaged/defective. (RMA?)
-
-
-
If the mouse wheel is not sturdy enough for your taste you can easily insert small pices of cropped paper between spaces around the mouse wheel
-
I used small piece of folded sticky note I always keep on my desk. :) No more wiggling mouse wheel.
-
-
-
Once the glicth is fixed re-attach the wires and reassemble the lower and upper part together.
-
When reattaching the glidez use same method backwards. Basically apply pressure on the the heated glidez and they should stick back to their place.
-


To reassemble your device, follow these instructions in reverse order.
18 comments
####WARNING####
You better stick with the hair dryer when warming up the glue of the glidez.
I just performed this guide and it totally worked out. But I used a heat gun to warm up the mouse glidez. Due to the heat, the plastic that shapes the left mouse button, deformed a bit. The mouse is actually working normal, but you need a significant higher force to push the LMB now.
So be careful about the temperatures when warming the glidez.
Beside this fault of mine, the guide is perfect. Mouse wheel glitch is completely gone.
thx.
mmda81
Thanks for the suggestion, already corrected. :)
Worked perfect with hair dryer and WD-40 in 15 minutes!
rinaf -