Introduction

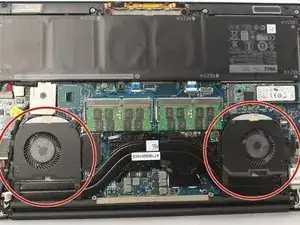
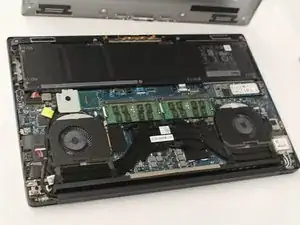
The cooling fans help keep the laptop from over heating. If your laptop seems especially hot or loud, it could be caused by a faulty fan or two.

  1. JhVaoLMhBEGlcqFG
    • Turn the laptop upside down.

    • Make sure the laptop is turned off.

    • Use a T5 Torx Screwdriver to remove the ten 3 mm long screws from the perimeter of the back of the laptop.

  2. OgImtWUkApWrFIPl
    OgImtWUkApWrFIPl
    aHrQx4bGJZwh6IF4
    • Open up the information panel door (on the middle of the back side).

    • While holding the door open, use a Phillips #00 Screwdriver to remove the two 10 mm long screws.

    use a J1, fits a lot better. no risk of rounding

    noah.mooresmith -

    Size is Philips #0 not #00

    Brandon McKee -

  3. KbpdJc6ueEstOgy3
    KbpdJc6ueEstOgy3
    F3ks3LQeHceJUAMf
    QDHjYStVkNUGOSLA
    • Carefully lift the 2 corners of the back panel close to the hinge upwards, to release the whole panel.

    • Do not force the panel off. If it does not come off easily, try to use a plastic spudger where it is stuck.

    Dégouté d'avoir suivi cette étape à la lettre ?

    N'ouvrez SURTOUT PAS le panneau par les deux coins arrières du côté de la charnière !!!

    Et N'utiliser SURTOUT PAS une spatule en plastique pour l'ouvrir si le panneau ne se détache pas facilement !!!

    Le panneau est fait pour s'ouvrir par les coins avant!!! A l'arrière des picots servent justement à l'empêcher de s'ouvrir !!!

    Le résultat si vous utiliser uns spatule à l'arrière… c'est que ces picots cassent… ?

    IL FAUT DONC OUVRIR LE PANNEAU PAR L'AVANT !! Et il est juste posé donc inutile d'utiliser une spatule…

    Voilà voilà je suis dégoûté d'avoir fait cette connerie alors qu'en cliquant sur un autre tuto (lien juste en dessous sur Google) ils le disent…

    J'espère qu'après mon commentaire l'auteur de ce tuto fera la modif…

    Sur ce… merci pour le tuto…

    Tanguy de Guenyveau -

    Bonjour Tanguy ! Désolée de votre mésaventure :( Et merci de ce retour fort précieux à qui voudra effectuer la réparation ! Votre commentaire est visible par tous, donc les utilisateurs seront avertis. iFixit est un wiki ; si vous le souhaitez, vous pouvez également adapter le tutoriel d’origine pour inclure votre retour d’expérience.

    Claire Miesch -

  4. BfIbDEhYgLpQ52jN
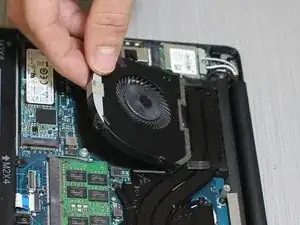
    • Use the Small Plastic Spudger to carefully disconnect the white connector from the black port.

  5. FftMIkBSkSQpyAMA
    FftMIkBSkSQpyAMA
    ieYqYaqBQ25r3H6a
    bBKMewCcjTWjeQG4
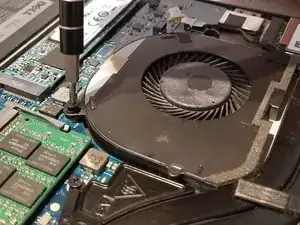
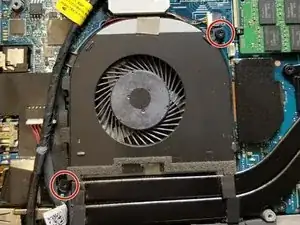
    • Use the Phillips #00 Screwdriver to remove the two 4 mm long screws.

    • The location of the 2 screws is different on each fan.

    • The left fan screw locations are circled in red.

    • The right fan screw locations are circled in orange.

  6. imIFbMjLoQLUZDOl
    imIFbMjLoQLUZDOl
    AIEtUjWPZVBjvXUr
    • With the screws removed, lift up on the fan and remove it from the laptop.

Conclusion

To reassemble your device, follow these instructions in reverse order.

Brandon Schmidt

Member since: 04/10/18

1966 Reputation

3 comments

I removed the fans for cleaning the dust. Now the left fan is always at 100%. Can anybody help me with that problem? Is it possible to somehow misconnect the fan? Or did I accidently did something to the temperature sensors?

Hendrik Lippka -

DId you manage to fix the problem? I have the same issue with the right fan.

James Reid -

I have the exact same issue on the “right” fan.

I wonder if it broke by blowing air through it

Albert Einstein -