
Introduction
If your keyboard is not working, replacing it should be easy after you follow these steps.
-
-
Remove the four 3mm Phillips #1 screws holding the battery.
-
Unhinge the connector cable to the battery.
-
Remove the battery.
-
-
-
Unscrew & remove the two 3mm screws (using a ph1 screwdriver bit) and the cable bracket, above the motherboard
-
Doing this will allow one to access the LCD-motherboard connector cables.
-
-
-
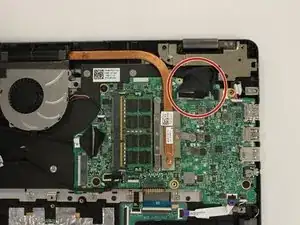
Disconnect the antenna cable (under the left hinge)
-
Disconnect the LCD and Touchscreen display cables under the right hinge.
-
-
-
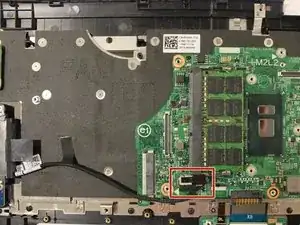
Begin by unclipping the cable connecting the fan and the motherboard.
-
Gently separate the motherboard cable from the clamp at the bottom of the fan.
-
Remove the cable.
-
-
-
Once the battery, screen, cooling fan, trackpad are out, the device would resemble the one in the first picture of this step.
-
Unscrew the three screws connecting the copper pipe to the motherboard.
-
Remove the copper pipe.
-
-
-
Unscrew the three 2mm wafer screws holding the motherboard.
-
Unplug the DC cable from the motherboard.
-
-
-
Unscrew the three 3mm screws holding the hard drive (using a ph1 screwdriver bit)
-
Remove the hard drive
-
-
-
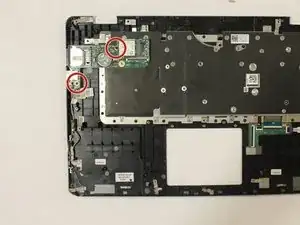
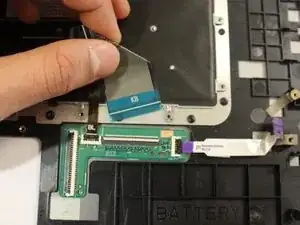
Unscrew the two 3mm screws holding the daughter board (using the ph1 screwdriver bit).
-
Set the daughterboard aside. NOTE: the daughter board doesn't have to be removed
-
-
-
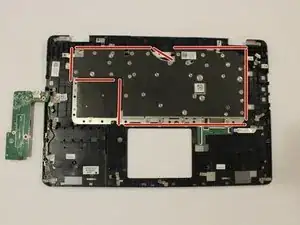
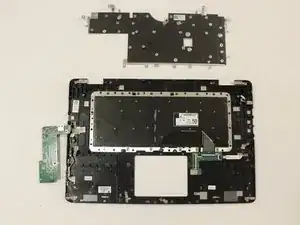
Unscrew & remove the twenty-eight 2mm bracket screws holding the keyboard bracket (using a PH000 screwdriver bit)
-
Remove the keyboard bracket
-
-
-
Unscrew & remove the sixteen 2mm screws holding the keyboard (using a PH000 screwdriver bit)
-


To reassemble your device, follow these instructions in reverse order.