
Introduction
-
-
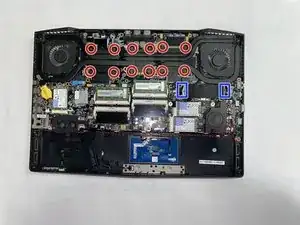
Remove the bottom 12 screws (in red)
-
Remove the 12 screws that hold the heatsink (in red)
-
Pull off the outer and inner black ribbons (in dark blue)
-
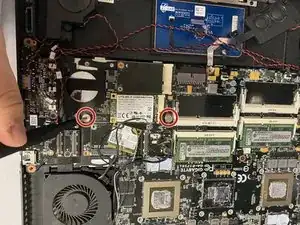
Remove the two screws (in red) holding in the mSATA (in light blue)
-
Disconnect the four plugs (in orange)
-
Remove the two screws (in red) holding the wireless card (in yellow)
-
-
-
Remove the six screws that hold the trackpad, right speaker and motherboard in place (in red)
-
-
-
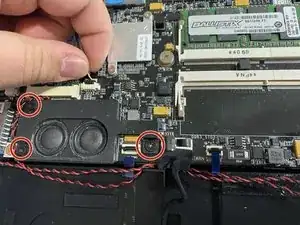
Remove the three speaker screws ( in red)
-
Under the left speaker pull off the orange ribbon (in dark blue)
-
Right next to the orange ribbon pull off the blue ribbon for access to remove the motherboard (in dark blue)
-


Conclusion
To reassemble your device, follow these instructions in reverse order.