Introduction

  1. 4BDpu4P2ZtD3fQuC
    4BDpu4P2ZtD3fQuC
    XbgI4tDQc3vK63jO
    nsN3OxA3Ph2Elt3c
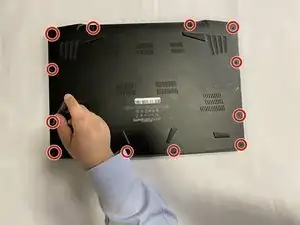
    • Remove the 12 bottom screws (in red)

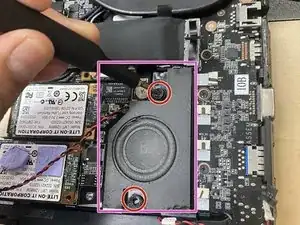
    • Locate the right speaker (in purple)

    • Disconnect all 4 cables (in orange)

  2. XUPRdTogdXecePR3
    XUPRdTogdXecePR3
    HfgGolDauNGa1ARC
    w2EJCKFgmaXiJRPI
    • Remove the 2 screws holding the speaker (in red)

    • Remove the 3 screws holding the board in place (in red)

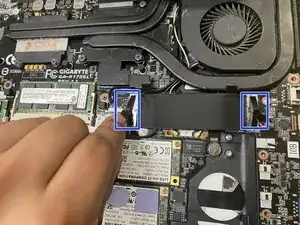
    • Pull off both of the outer black ribbon (in blue)

  3. jMHkmTNTu63XHxfB
    jMHkmTNTu63XHxfB
    xJTLYvDOFxXrPRME
    IKg1haHXgtqGrSHY
    • Pull off the inner black ribbon (in blue)

    • Remove the now revealed screw (in red)

    • Place any finger under the board and slowly lift up to remove the board to replace it

Conclusion

To reassemble your device, follow these instructions in reverse order.

Alexis Hernandez Jimenez

Member since: 25/08/22

557 Reputation

0 comments