Introduction

Use this guide to replace the lower case on your Acer Aspire A515-51G.

Before you perform this repair, be sure to completely power off and unplug your laptop. Make sure the laptop is not in standby, sleep, or hibernation mode.

  1. cHQR6tBWPhWCiUCG
    cHQR6tBWPhWCiUCG
    6vQpbUHlFwB2SJsi
    • Use a Phillips screwdriver to remove the 20 6.6 mm screws securing the case.

  2. YREbvjXsVMFBWGSW
    YREbvjXsVMFBWGSW
    VWLY1KYCBS4IahrA
    • Insert an opening pick between the lower case and the chassis on the front right edge.

  3. jsQY224l4sZ66LGC
    jsQY224l4sZ66LGC
    FcZnMDGpwA6UuYVV
    jDUTrItB5WDKTPqH
    • Slide the pick along the front edge to release the clips securing the lower case.

  4. rBgE2JnEIjAUPyt6
    rBgE2JnEIjAUPyt6
    c2JEMrlBvHnf6XmF
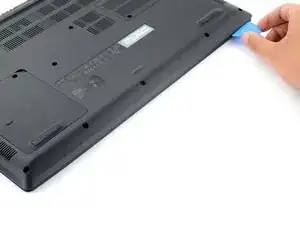
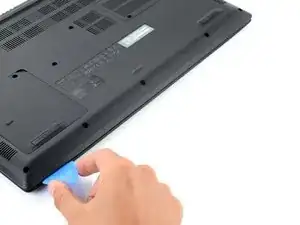
    • Continue sliding the opening pick along the perimeter of the lower case to release the remaining clips.
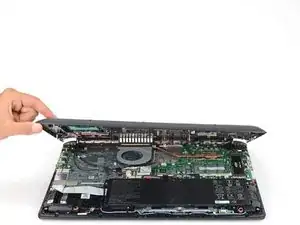
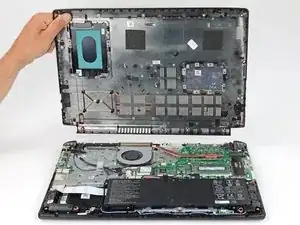
  5. ZGfCJOMA2PZWweCu
    ZGfCJOMA2PZWweCu
    MTcjjR1NTCyUIWmZ
    HAQZkwbHuHZAdaEX
    • Lift the lower case from the chassis and remove it.

    • During reassembly, this is a good point to power on your laptop and test all functions before sealing it up. Be sure to power your laptop back down before you continue working.

Conclusion

To reassemble your device, follow these instructions in reverse order.

Take your e-waste to an R2 or e-stewards certified recycler.

Repair didn't go as planned? Try some basic troubleshooting, or ask our Acer Aspire answers community for help.

Spencer Day

Member since: 14/09/22

9061 Reputation

0 comments