
Introduction
This is a guide for dust cleaning a cooling fan in an ACER Aspire V5 laptop.
-
-
Start by placing laptop on non-static surface and powering off completely. Apply static resistant wristband.
-
-
-
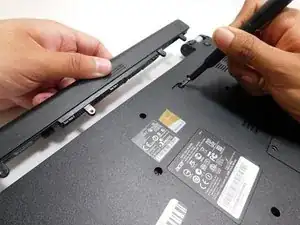
Close laptop and flip over. Locate battery slide release. This guide marks the location with a red circle
-
Use pointed tool (we used a screwdriver) to slide release to the left when facing laptop from the non-battery side.
-
Gently pull battery away from laptop with slide release held open.
-
-
-
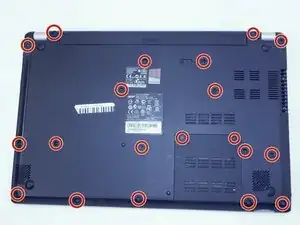
Remove all twenty 6.7 mm Phillips #0 screws from the bottom side of the laptop.
-
Once all necessary screws are removed, turn laptop over and open.
-
-
-
Once cables are safely detached, lift keyboard off of laptop and place on safe, non-static surface.
-
-
-
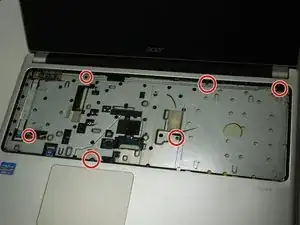
Beneath the keyboard is the undercarriage panel, which needs to be removed to access the motherboard. The screws marked in this image must be removed
-
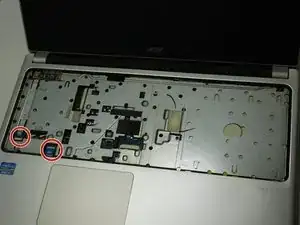
Detach two cables marked in this picture by lifting plastic lock mechanism above flex cable.
-
Gently pull cable out with tweezers.
-
-
-
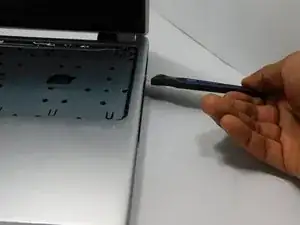
Slide Jimmy Tool in between front and back panel of the laptop as demonstrated in this photo.
-
Slowly rotate jimmy tool in had until top panel pops lose. repeat on all sides until top panel is free of main body.
-
Gently lift top panel free of main body. You now have access to the Motherboard.
-
-
-
Using a Compressed Air can spray a few short bursts of pressured air until clean or no dust is visible.
-


To reassemble your device, follow these instructions in reverse order.